
How to Present the Simulated Before and After in Consultation
Showing a patient a simulation of the "after" on a photo of their own face is one of the most direct ways to make the plan understandable. It is also a delicate moment: the image is powerful, and if it is presented the wrong way it becomes a promise, creates unrealistic expectations or looks like a sales trick.
This guide is about the "how": when to show it, what to say beforehand, how to lead the comparison, what to do with the patient's reaction and what never to do with the image after the consultation.
Why does showing a simulation help the patient decide?
Facial harmonization patients rarely have the vocabulary to describe what they want. They say "I want to look less tired" or "I think my chin is small". You translate that into areas and volumes. The simulation closes the loop in reverse: it turns your technical plan into something they recognize in the mirror.
It helps on three fronts:
- It aligns expectations. The patient sees the proposed intensity and can say "that's it" or "I wanted less" before any needle.
- It reduces the fear of looking artificial. A subtle change on their own face usually reassures more than any explanation.
- It explains why each area is treated. Seeing that the chin changed the balance of the whole profile is more convincing than talking about proportion.
An illustrative simulation does not replace the assessment or the informed consent. It is a visual aid for the conversation.
When to show it: the order that works
Where the simulation sits in the consultation changes its effect. Shown too early, before you explain the plan, it becomes a "filter" and the conversation revolves around the image. Shown after the price, it looks like a justification.
| Moment | What happens | Goal |
|---|---|---|
| 1. Listening and assessment | Concerns, history, exam, standardized photo | Understand the patient |
| 2. Explaining the plan | Areas and volumes, in simple language | The patient understands what will be done |
| 3. Simulation | Before and after on their photo | The patient visualizes the plan |
| 4. Adjustment | Change areas or intensity, if they want | Their plan, not only yours |
| 5. Prices | Written quote, with a validity period | A decision about something concrete |
The base photo has to be good. Frontal, diffuse light, camera at eye level, plain background, neutral expression. A tilted photo or one with harsh shadows produces a worse simulation and an unfair comparison. The guide to standardized clinical photography covers this in detail.
What to say before turning the screen
The sentence that comes before the image defines how it will be received. Three elements must be in it: what it is, what it is for and what it is not.
"I'm going to show you a simulation made from your photo. It was generated by artificial intelligence following exactly the plan I explained to you, area by area. It's meant to give you an idea of the direction, it's not a guarantee of how you'll look. The actual result depends on your tissue and on how your body responds."
It may seem that this caveat weakens the image. In practice, it does the opposite: the patient sees that you are being honest, and their trust in the image increases.
How to lead the comparison
Start with the before, calmly
Let the patient look at their own photo for a few seconds. Many people are surprised by their own frontal photo, and it is better for that reaction to happen before they see the after. Use the time to point out their main concern on the image.
"Look here at the area you mentioned. You can see the shadow under your eyes, mostly on the left side."
Reveal the after gradually
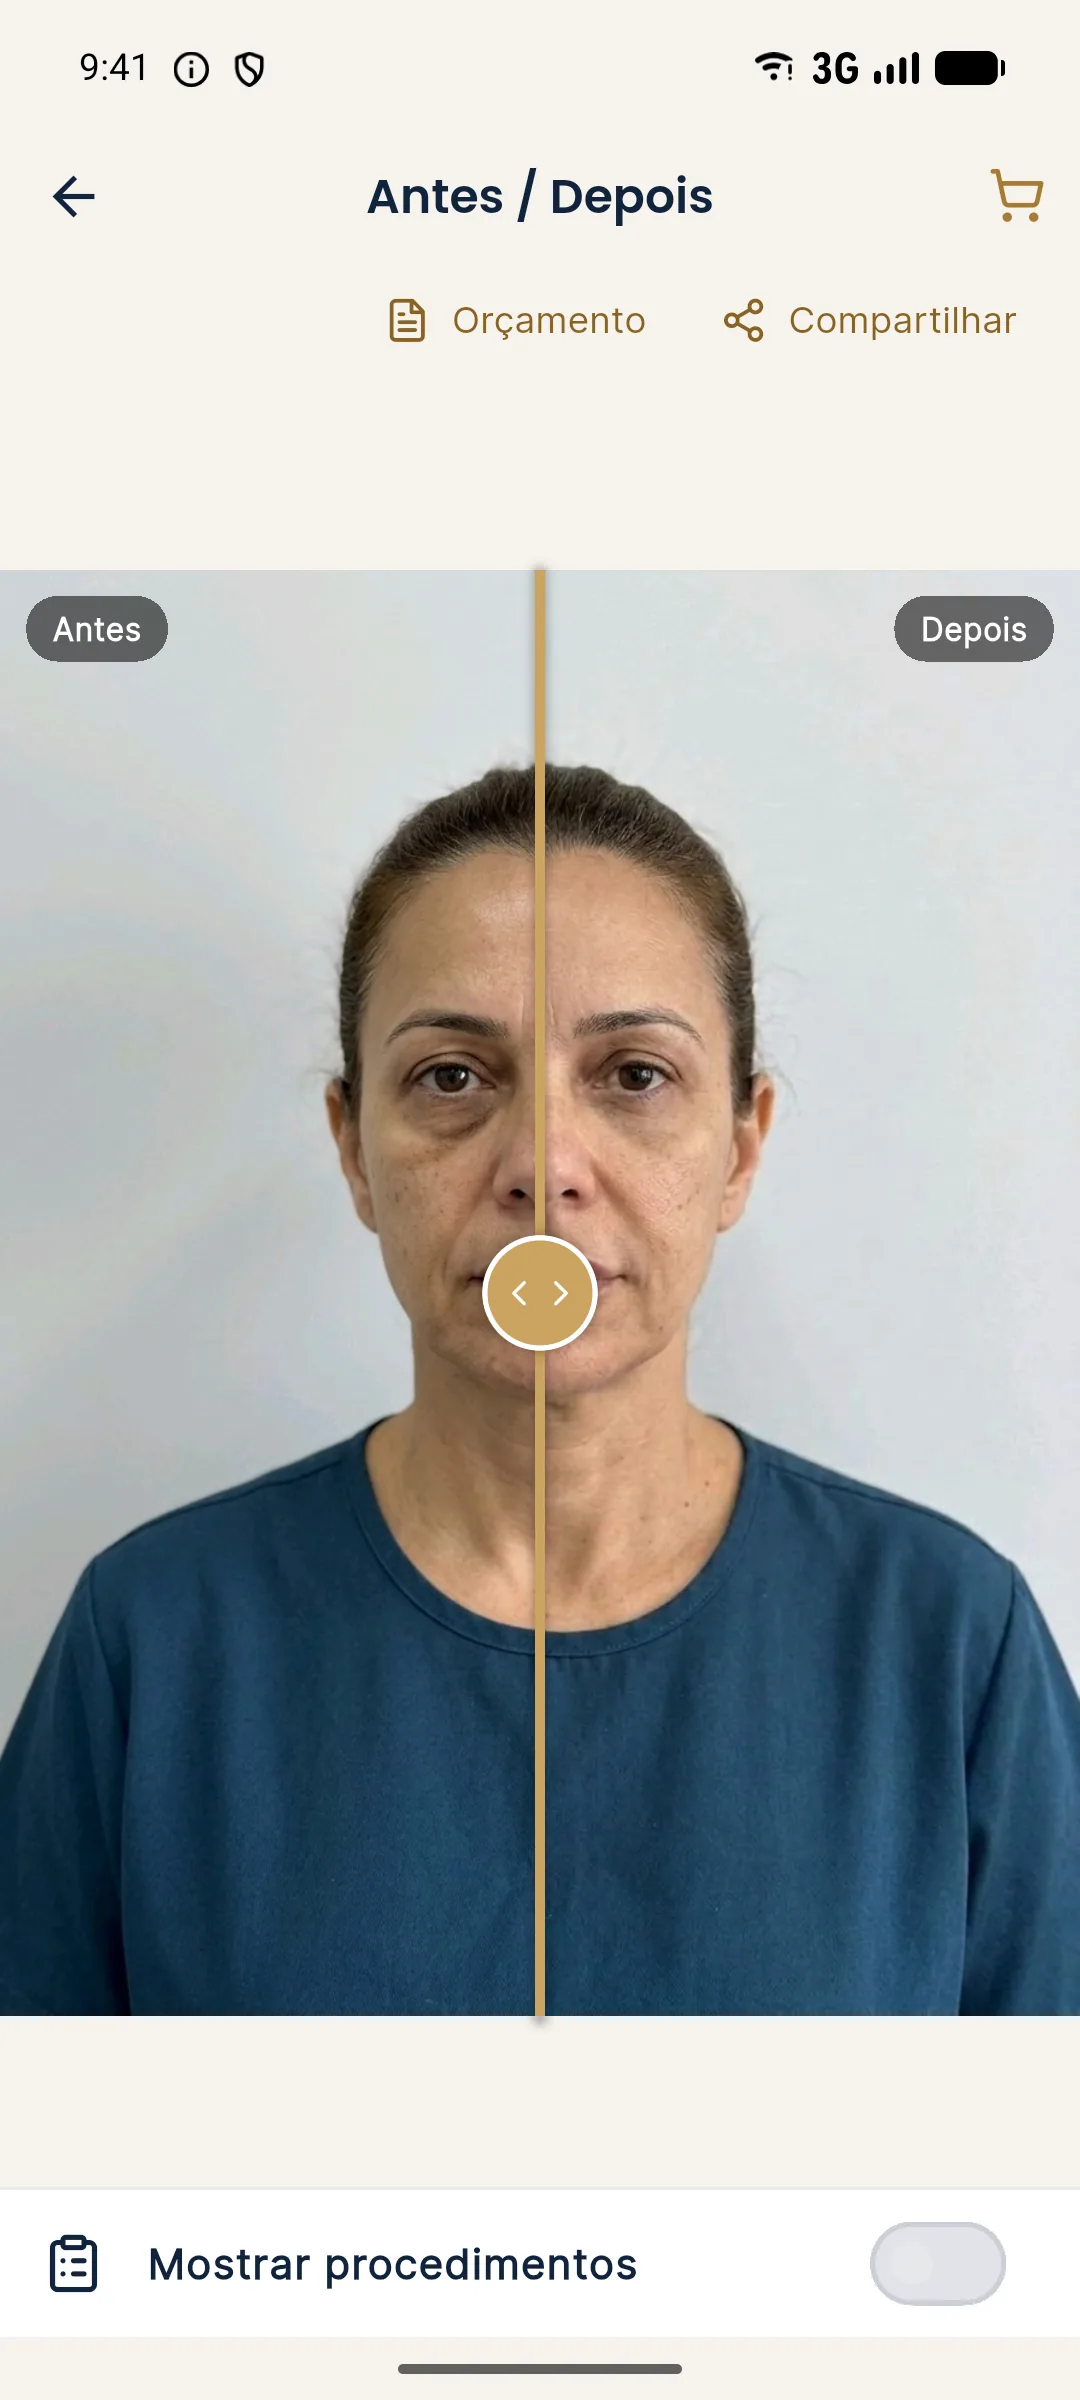
A slider you drag slowly works better than switching between two full images. The eye follows the line and notices the change area by area.
Name each change
As the after appears, point out what changed and tie it to the plan.
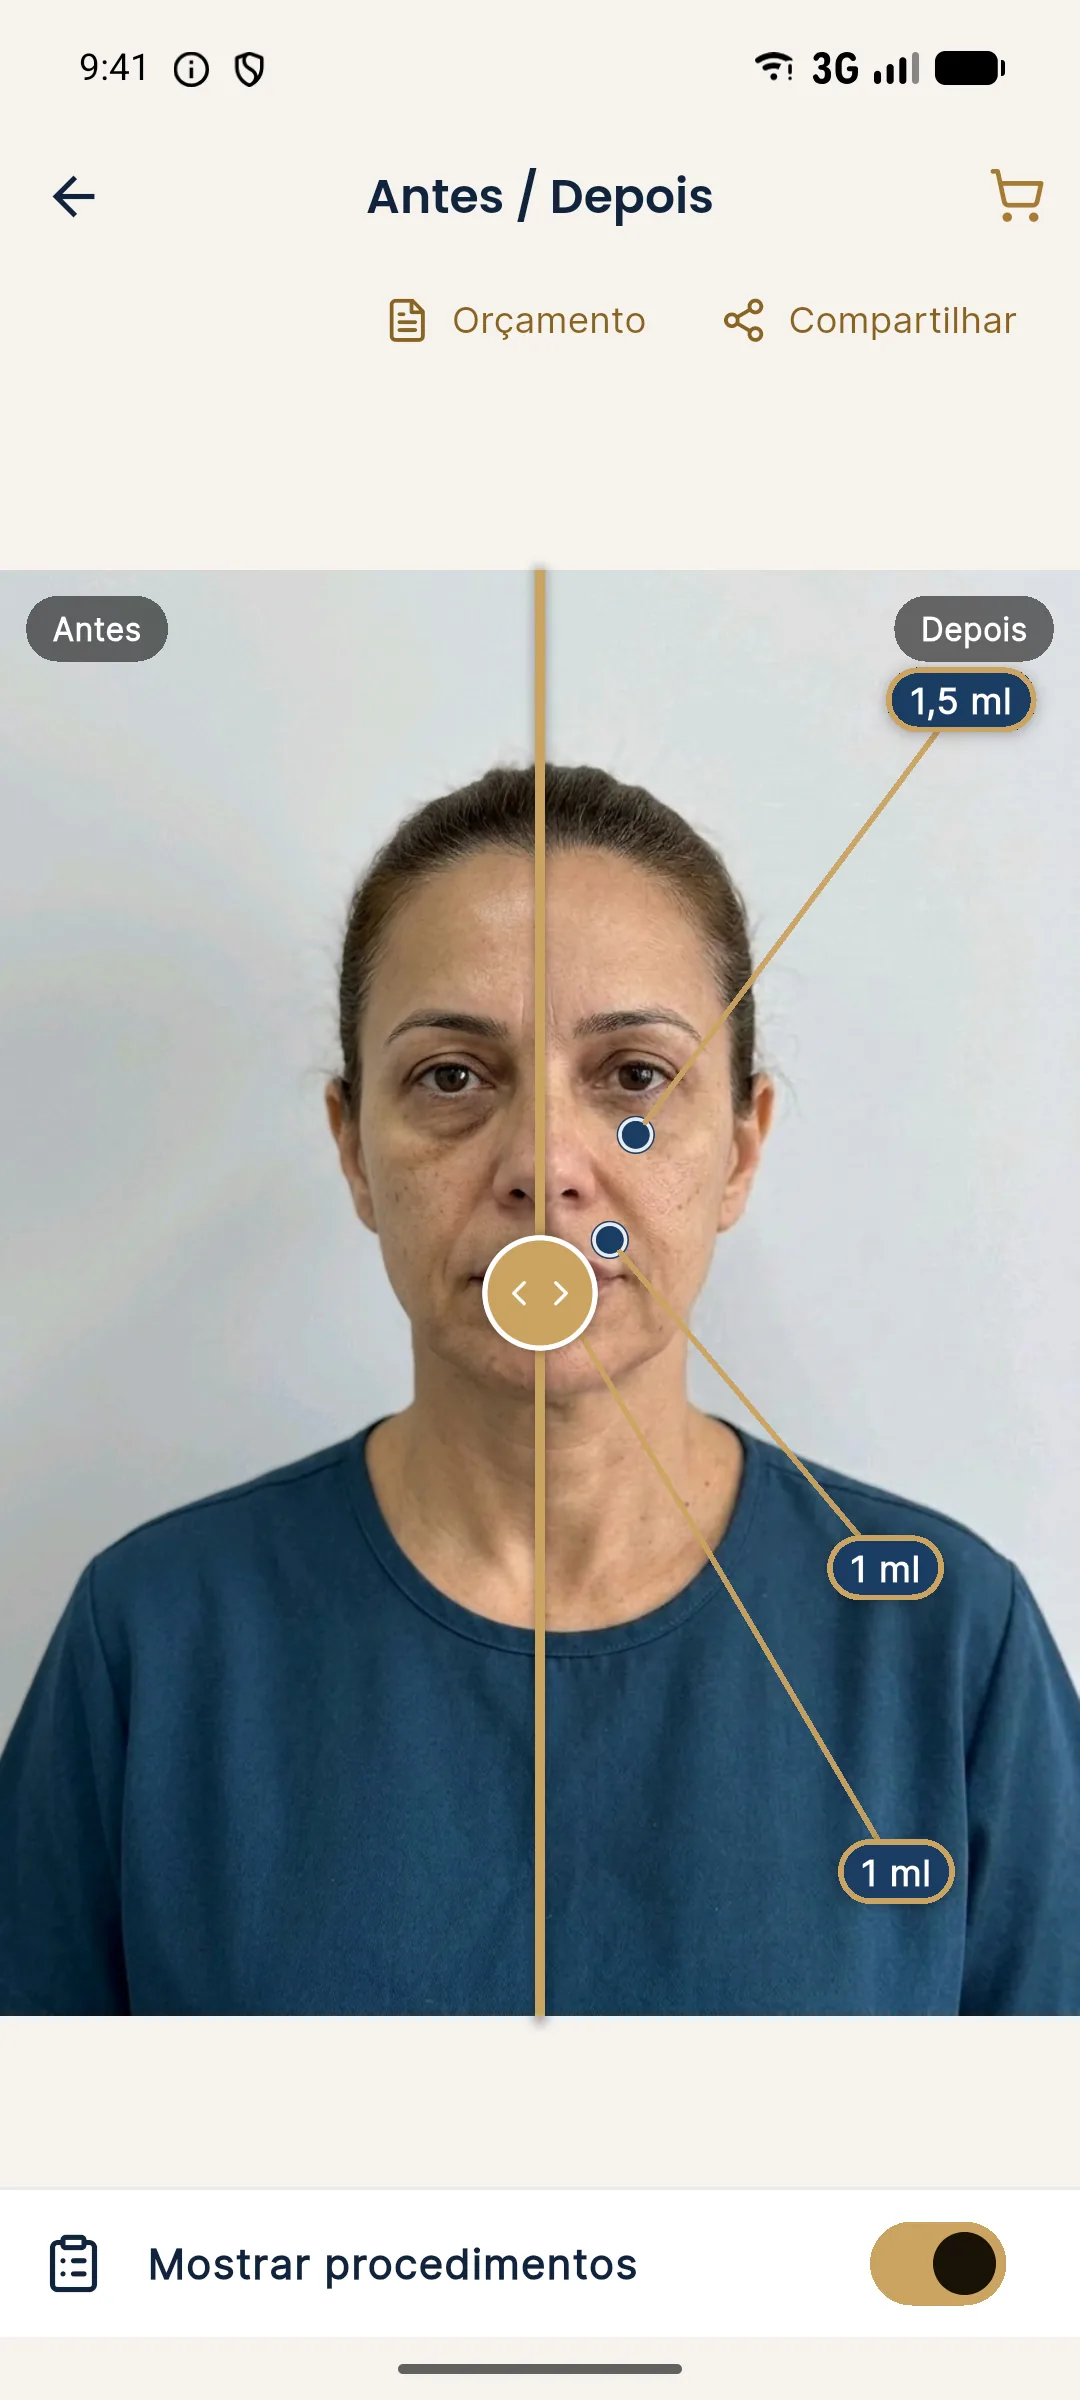
"Here is the chin, with 1 ml. See how the profile becomes more balanced with the nose. Here are the lips, also with 1 ml: more definition, without adding much volume."
Showing the volume of each area over the image helps the patient understand that intensity relates to the planned amount, and prepares the conversation about prices, which in the quote will also be per ml.
Go back to the before
Finish by dragging back to the before. Comparing in both directions makes the difference clearer and reinforces that the change is localized, not a new face.
How to read the patient's reaction
The reaction to the simulation says a lot about their expectations. Some common situations and how to handle them:
| Reaction | What it usually means | How to handle it |
|---|---|---|
| "Wow, that's it" | Plan aligned with expectations | Reinforce that it is a simulation and move on to prices |
| "That seems like too little" | Expectations higher than the plan | Explain safety and naturalness limits; discuss future stages, without promising |
| "That's too much" | Fear of overdoing it | Reduce the volume or areas and generate again |
| Silence | Discomfort or doubt | Ask "what do you think?" and wait for the answer |
| "But will it really look like this?" | Looking for a guarantee | Calmly repeat that the image is an illustration and explain the variability |
"That seems like too little" deserves special attention. It is the moment when the temptation to increase the volume to please the patient appears. The indication is still yours, based on assessment and safety. If the patient wants more than is prudent, that needs to be said, and recorded. A baseline facial asymmetry, for example, can limit what can be balanced.
What never to do with the simulation
- Do not use it as a promise. Not in writing, not in a message, not in your tone of voice. "It will look like this" is a sentence you should not say.
- Do not publish it as a result. The simulated image is not a treatment before and after. Publishing it as if it were misleads the public and goes against advertising rules. See what you can publish according to the CFO and CONAR (in Brazil).
- Do not show other patients' simulations as a reference. Each simulation is about one specific face. Using someone else's exposes sensitive data and sets the wrong expectation.
- Do not adjust the plan just to make the image look good. The plan is clinical. The image follows the plan, not the other way around.
- Do not forget privacy. A photo of the face is sensitive personal data. Have consent for recording and use, in line with the LGPD (Brazil's data protection law) and the guide to consent and the LGPD for photos.
After the consultation: what to give the patient
If the patient wants to take the image home, hand it over with the simulation notice visible and, preferably, together with the quote. That way they compare the two right things: the plan and the price of the plan. When they return for the procedure, the same image can be used to confirm that what was agreed is what will be done.
After treatment, a photo of the actual result, taken with the same protocol, closes the cycle. Comparing the simulation and the result with the patient is an honest conversation and usually builds trust, even when the result turned out different from the simulation.
How to do this in Harmy
In Harmy, the Before / After screen is a slider with a gold line you drag, and two fingers zoom. The "Show procedures" button draws the ml of each treated area over the after image. The projection changes only the areas you marked, at the intensity of the volumes in the Plan, with no makeup or skin retouching, which helps keep expectations realistic. When you share, the image goes out with the clinic's header and the simulation notice. Details in before and after and sharing.
Quick checklist
- Standardized, good quality base photo.
- Plan explained before the image.
- Opening sentence: what it is, what it is for, what it is not.
- Slow comparison, area by area, back and forth.
- Volumes tied to the changes.
- Patient's reaction heard and plan adjusted, if needed.
- No promises, no publishing as a result.
- Quote handed over together with the image.
Frequently asked questions
At what point in the consultation should I show the simulated before and after?
After the assessment and the explanation of the plan, and before discussing prices. That way the image illustrates something the patient has already understood, and the quote arrives with the plan already visualized.
Can I show the simulation as if it were the result the patient will get?
No. The simulation is an illustration of the direction of treatment. Say so before showing the screen and repeat it at the end; the actual result depends on the tissue, the patient's response and the technique.
Can I send the simulated image to the patient?
Yes, for their personal use, with the simulation notice visible and within what was agreed about image use. It should not be published as a treatment result.
What if the patient does not like the simulation?
Ask what bothered them and adjust the plan together, changing areas or volumes. A rejected simulation is valuable information and prevents a procedure that would not meet their expectations.