
Best Practices for Marking Areas in Harmy

Marking is the part of the flow where the quality of the projection depends most on you. The photo goes in, the app places the points and the AI generates the after, but the professional decides where and how much. These best practices gather what usually separates a projection that is useful in the consultation from one that only confuses.
Before marking: the photo comes first
The projection inherits everything in the photo, from shadows to head tilt. If the photo isn't good, marking won't fix it. Check the standard in standardized frontal photo and, if the app complains, see poor photo in Harmy: how to improve it.
Which points does the app offer?
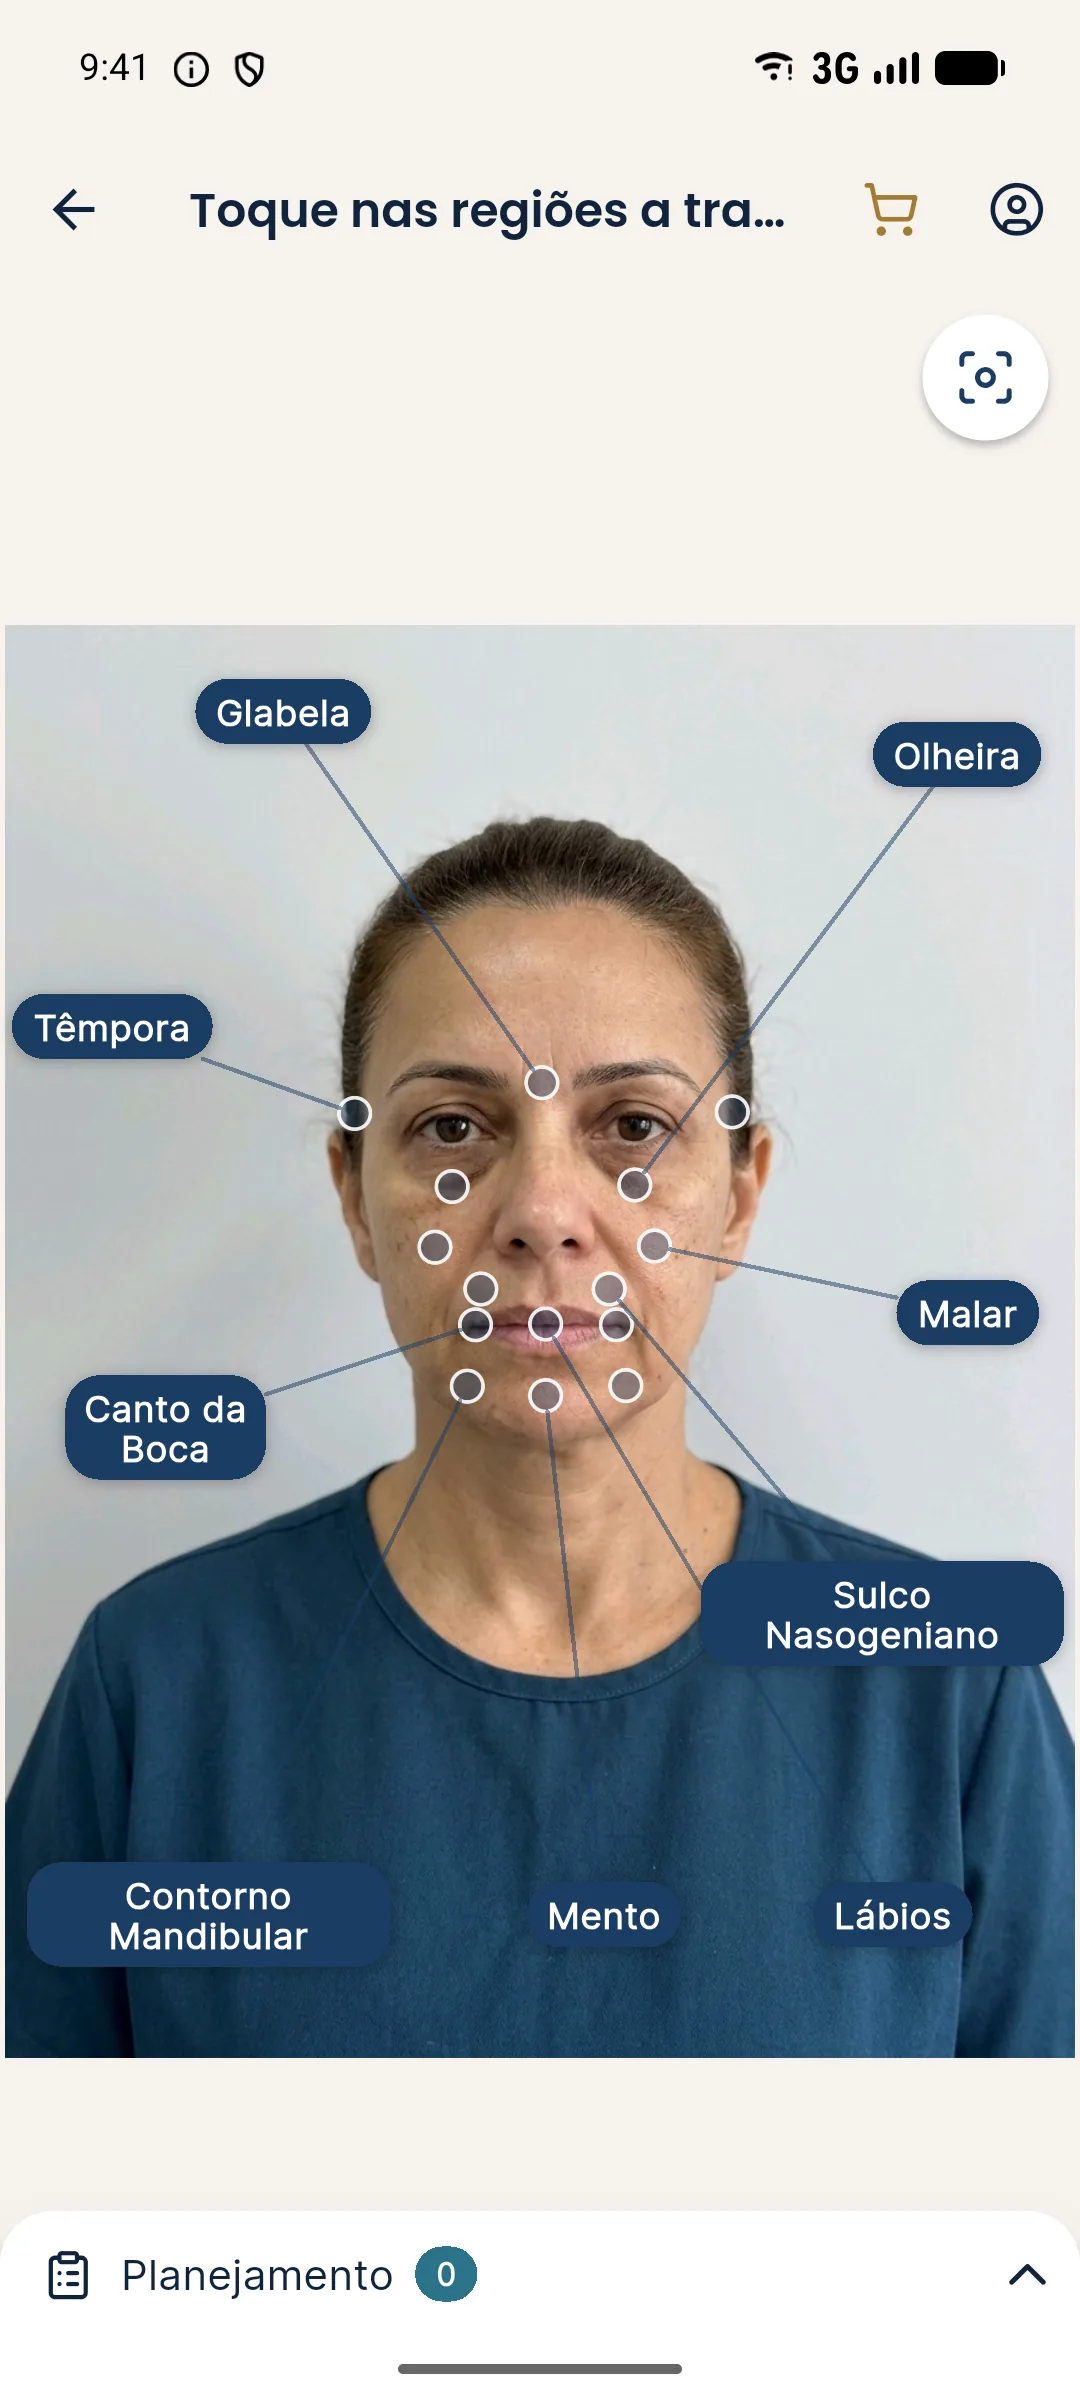
Harmy has nine points: Glabella, Temple, Tear Trough, Cheekbone, Nasolabial Fold, Mouth Corner, Lips, Chin and Jawline. Areas without their own point, such as the nose and forehead lines, are not part of the marking. If your plan includes an area like that, let the patient know that the projection covers only part of it.
Mark the plan, not the maximum possible
Every extra area marked dilutes the projection and inflates the quote. The patient sees several small changes and can't tell which one is the priority. Prefer a lean plan, with a priority order you can explain, and leave the rest for a second stage. The page marking fewer areas gives better projections goes deeper on this point.
How to choose the volume for each area
The volume in ml defines how noticeable the change is. Use ranges that make sense for the area, always at the discretion of the qualified professional after assessment. An inflated volume produces an image that neither the consultation nor the actual result can back up. For the logic of the scale, see how to choose ml from 0.5 to 5 per area.
Quick step by step
- With the photo approved, tap the points of the areas to be treated.
- Use two fingers to zoom in on the photo if two points are close together.
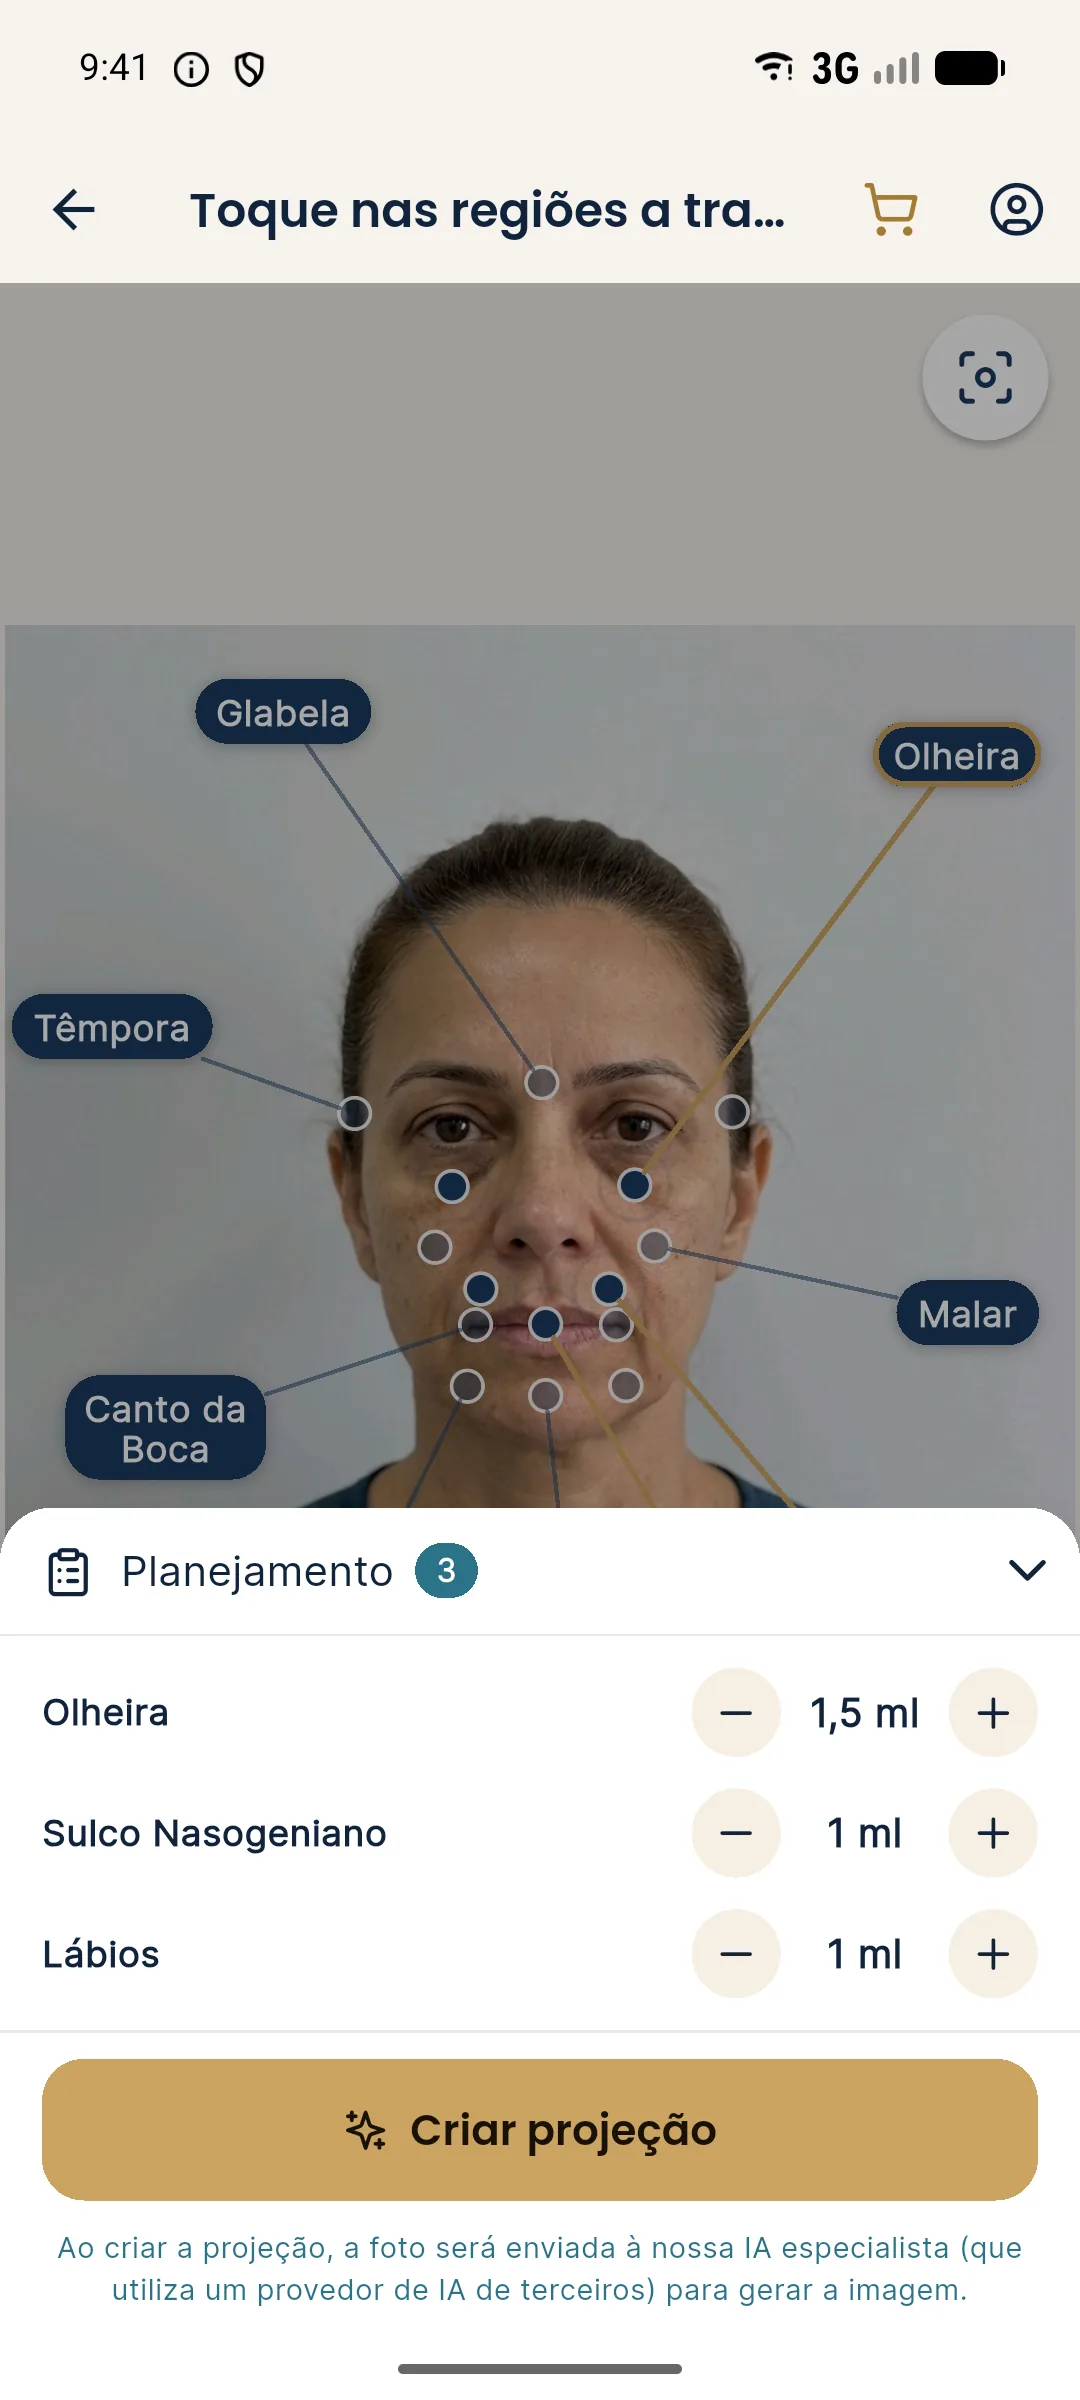
- Open the Plan and adjust the ml and intensity of each area.
- Check the count and the volumes.
- Tap Create projection.
The errors that show up most
| Situation | How to avoid it |
|---|---|
| Wrong area marked | Tap again to unmark and use zoom |
| Volume copied from another patient | Reassess each case, without reusing numbers |
| Marking everything "to see what happens" | Mark only the plan; spend credits on projections with a purpose |
| Forgetting the total on bilateral areas | Add both sides before entering the value |
| Using the projection as a promise | Present it as an illustrative simulation |
Final tips
- Decide the plan before opening the app, preferably with the patient still in the chair.
- Use the example patient to practice marking without spending a projection on a real patient.
- Reopen the history to compare two versions of the plan for the same patient. Each new projection uses credits, so choose carefully.
- Note your reasoning for the volume in the chart: it helps when the patient asks "why 1 ml here and 2 ml there".
Frequently asked questions
How many areas should I mark in a Harmy projection?
The ones that are part of the plan you would actually propose. Marking extra areas pulls the projection away from the quote and dilutes the focus of the conversation.
What do I do if I tapped the wrong area while marking?
Tap the same point or label again to unmark it. Use two-finger zoom to hit the right point on areas that are close together.
Does the ml volume in the marking have to be exact?
Use the volume you would apply within the usual range, at your discretion after assessment. The step is 0.5 ml, from 0.5 to 5 ml per area.
Can I resume an interrupted marking in Harmy?
Yes. The draft with the photo, areas and volumes is saved, and the home screen offers to resume it.