
Side by Side or Slider Comparison: Which to Use in the Visit

Quick facts
- Side by side
- Two parallel images; easy to read, ideal for records, printing and a calm conversation.
- Slider
- A line you drag that reveals before and after in the same place; ideal for seeing subtle changes.
- Prerequisite
- Standardized and aligned photos; the slider exaggerates any misalignment.
- Rule
- The format changes perception; choose the one that documents best, not the one that impresses most.
Two photos are ready, and the next question is how to show them. Placing one next to the other seems the obvious choice. The slider, that line the patient drags to reveal the before and the after in the same space, seems more modern and engaging. Neither is better at everything: each answers a different need in the visit.
This page compares the two formats, shows what each one highlights or hides and suggests when to use each.
How does each format work?
Side by side: two images of the same size, one on the left and one on the right (or one above the other), with "before" and "after" labels. The eye moves from one to the other and compares by visual memory.
Slider: a single frame, in which a vertical line separates the two images. To the left of the line the before appears, to the right the after (or vice versa). As the patient drags, they see the same area change in the same place, without moving their gaze.
What are the advantages of each?
| Aspect | Side by side | Slider |
|---|---|---|
| Reading subtle changes | Harder, the eye has to memorize | Easier, the change appears at the same point |
| Printing and records | Simple, becomes a file or page | Only works on an interactive screen |
| Sensitivity to alignment | Tolerates small differences | Any shift becomes a "jump" |
| Emotional effect | Neutral, more analytical | More impactful, which can exaggerate perception |
| Use in the patient record | Suitable | Not suitable as a record |
| Focus on detail | Requires zooming on both | Allows enlarging a single area and dragging |
| Conversation with the patient | Good for explaining step by step | Good for the patient to "see it happen" |
When should I use side by side?
- Clinical record: the patient record should have intact images, and side by side preserves that.
- Printing or PDF: quote, report and material for the patient to take home.
- Analytical conversation: when you want to point to an area and explain it in detail, at a calm pace.
- Photos with small position differences: side by side tolerates misalignment better.
- Discussion with colleagues: the reading is more objective, with less impact effect.
When should I use the slider?
- Subtle changes: such as those that usually occur in the under-eye area, folds and lips, where the difference is small and the eye needs to see it always at the same point.
- Planning visit: to show the patient what an illustrative simulation proposes and let them explore it themselves.
- Screen presentation: phone or tablet turned toward the patient, when eye contact is part of the conversation.
- Comparing projection with actual result: where alignment is controlled.
What is the alignment risk with the slider?
Imagine two photos in which the patient's head is 2 mm further right in the second. Side by side, no one notices. In the slider, the line passing makes the face "jump" or look swollen on one side. To avoid this:
- Standardize the photo at the shot (light, distance, height, expression).
- Align the two images by the eyes, as in aligning photos by the eyes to compare.
- Use the same crop frame on both.
- Check the slider before showing it to the patient, dragging from end to end.
How do I show it honestly?
Two simple practices reduce the risk of misleading:
- Never hide the format. When it is a projection, say "this is an illustrative simulation" and, when it is a real photo, say "this is a record of an actual result."
- Show the comparison once at the slider's pace and once side by side, so the patient sees the difference without the effect of motion.
For using the images after the visit, read photo to compare the procedure result and showing the projection to the patient with the right photo.
What does Harmy offer?
In Harmy, the result appears in a Before/After slider: you drag the gold line and use two fingers to zoom. "Show procedures" displays the ml for each area over the After. There is also presentation mode, which fills the screen with only the slider so you can turn the phone toward the patient, and the magnifier, which enlarges only the treated area, with before and after side by side.
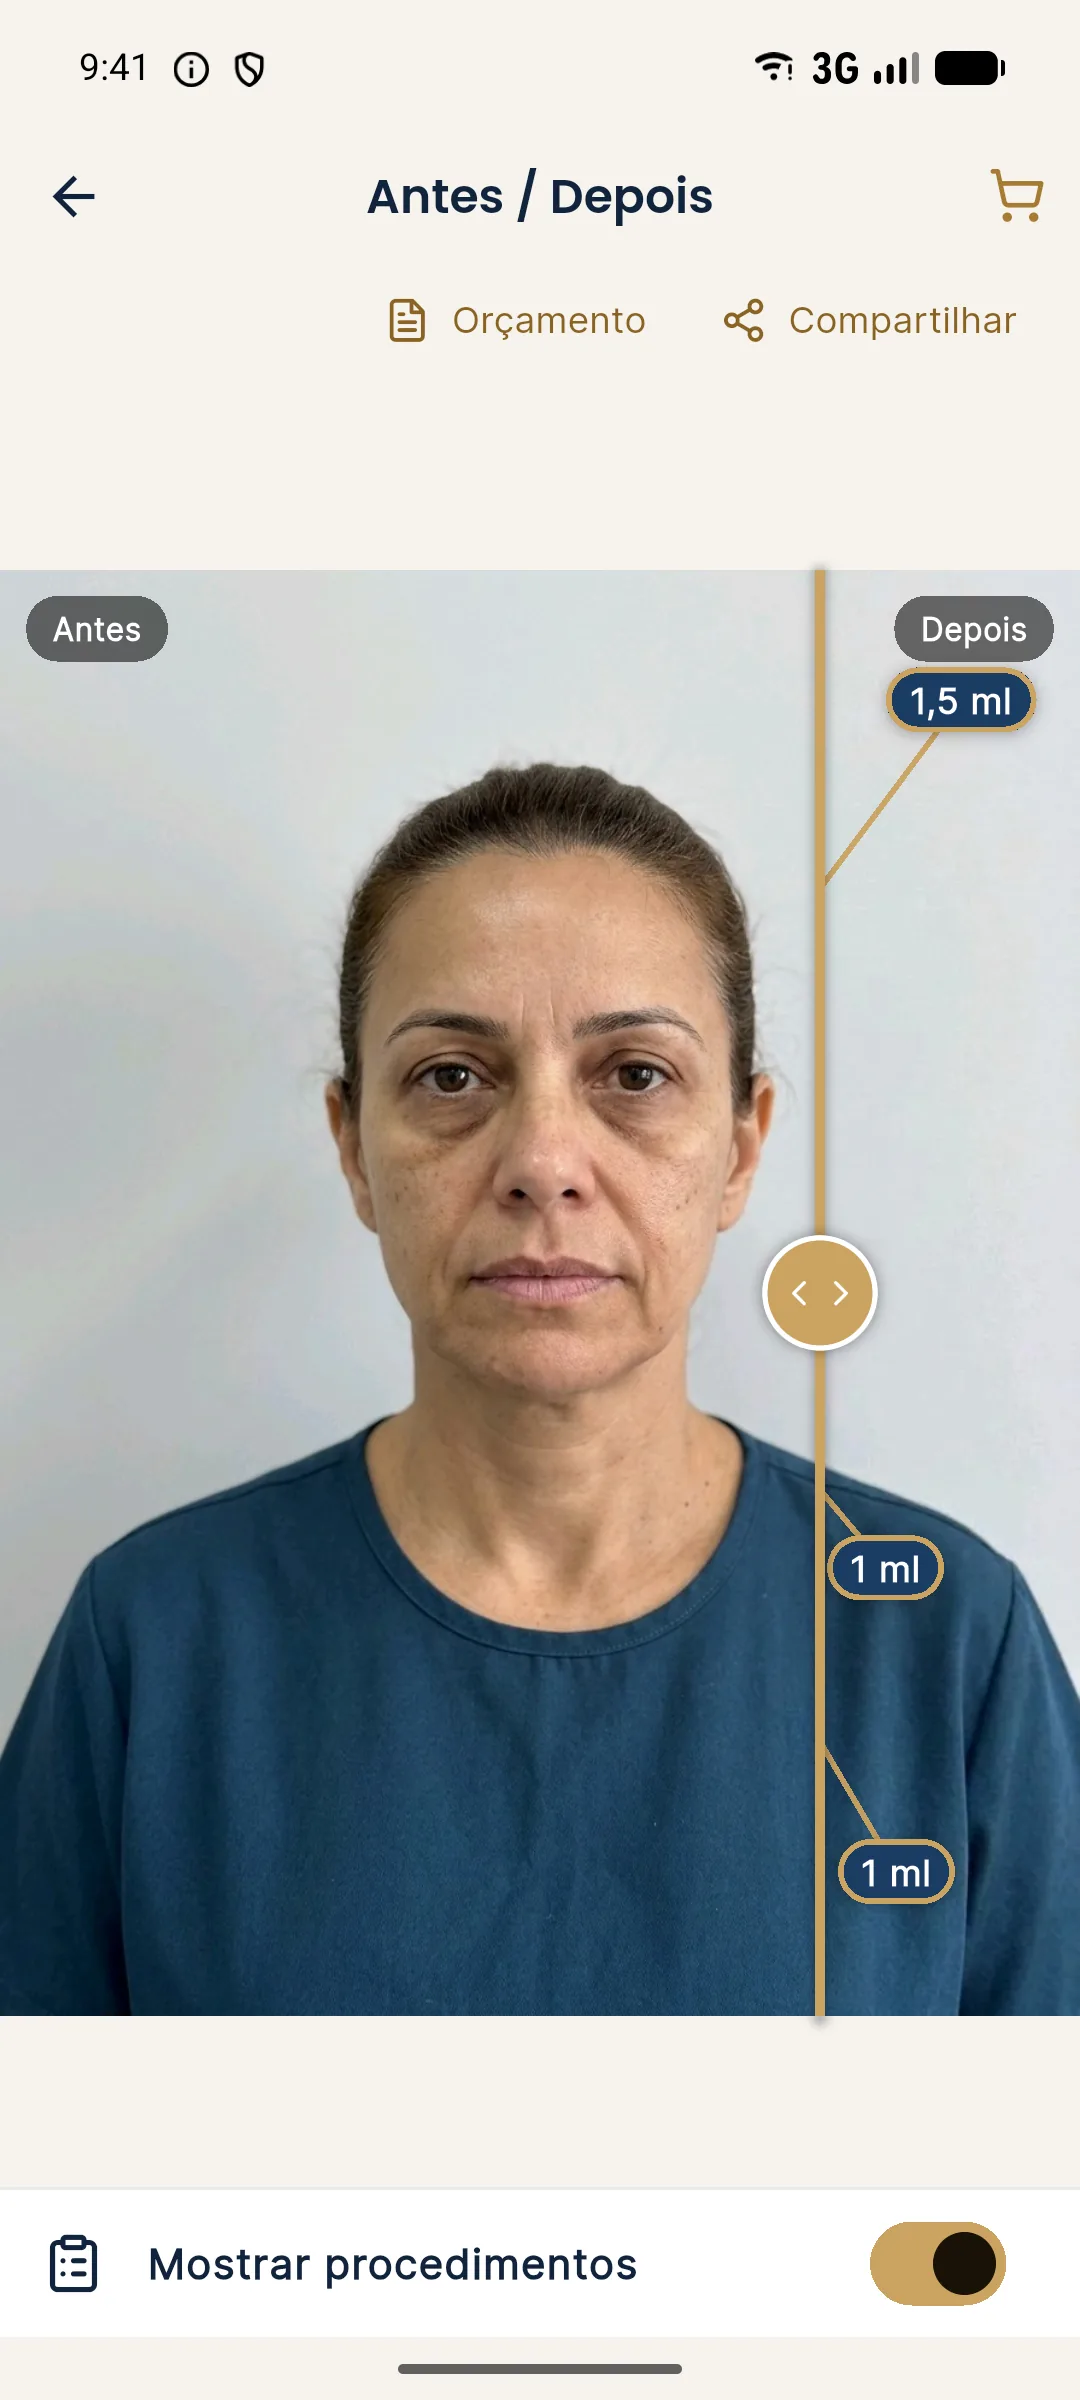
In other words, the app already delivers both formats: the slider for the conversation and side by side in the magnifier. The image is an illustrative simulation generated from the patient's photo, not a promise of results. See its use in before and after and sharing.
Practical recommendation
Use side by side for the record, printing and analytical conversations. Use the slider for the planning visit and for subtle changes, as long as the photos are well aligned. In any case, do not let the format take the place of the explanation: show, explain what the image is and what it is not, and leave the decision to the patient.
Frequently asked questions
Which is better: side-by-side before and after or a slider?
It depends on the use. Side by side is better for records, printing and a more analytical conversation. The slider is better for showing subtle changes, because it reveals the difference at exactly the same point in the image.
Can the slider mislead the patient?
It can, if the photos are not aligned or standardized. A shift of a few millimeters becomes a jump in the face when the line passes. That is why the slider demands better alignment than side by side.
Can I use a slider in the patient record?
The patient record needs intact images. The slider is a presentation format, and the record should keep the original photos, side by side or separate.
Does Harmy have a slider?
Yes. The projection appears in a Before/After slider, with a gold line that you drag and two-finger zoom. There is also presentation mode and a magnifier on the treated area.
Harmy images are illustrative simulations generated by AI from the patient's photo to support the conversation between practitioner and patient. They are not a promise of results. Indication, technique, product and volume are solely the decision of the licensed practitioner. This content is for information only and does not replace a clinical assessment.