
Follow-up to Compare With the Simulation: How to Lead It

Quick facts
- Situation
- Follow-up to compare the actual result with the simulation shown earlier
- Principle
- The simulation was an illustration; the actual result is a different thing
- Caution
- Same light, same framing, nothing edited
- Records
- Actual photo, observations, and what was explained
The follow-up is where simulation and reality meet. If the conversation was handled well from the start, the patient understands that the image was an illustration, and the comparison becomes a monitoring tool. If it was not, the comparison can turn into a reproach. This page shows how to lead this follow-up honestly, keeping the simulation in its place.
What can and cannot the comparison show?
The simulation shows one possible direction, generated from a frontal photo and the planned volumes. The actual result is the outcome of anatomy, product, technique, time, and individual response. The two will never be identical, and they do not need to be. The comparison is for seeing what came close, what turned out different, and what is still changing. It is not for proving that the simulation "failed" or that the result "got it right." See difference between simulation and actual result and the simulation is not a guarantee.
How do you prepare the comparison?
The quality of the comparison depends on the quality of the actual photo. Use the same light, the same distance, the same head position, and the same expression as the before photo. Without that, any difference could be down to the angle. See standardized clinical photography and how to use the frontal photo in the conversation.
How do you lead the conversation?
Showing the before and the actual result first keeps the simulation from becoming the standard of comparison. After that, the simulation comes in as what it is: a supporting image for the earlier conversation. See comparing the simulation with the after photo.
How do you explain the differences?
Be specific and not defensive. Explain what may have caused the difference: settling time, anatomy, chosen volume, product, photo lighting. If you decided to use less volume than simulated, go back to the reason. If the result turned out more discreet, explain that this may be intentional.
| Difference | Possible explanation | Approach |
|---|---|---|
| Result more discreet than the simulation | Lower volume or initial stage | Reassess and talk about stages |
| Result still changing | Product settling | Schedule a reassessment. See follow-up with a result still evolving |
| Asymmetry the simulation did not show | The AI smooths out differences | Assess and discuss an adjustment |
| Area different from expected | Change of plan | Go back to the record |
| Patient satisfied despite the difference | Expectation aligned | Record and move on |
What if the patient is frustrated?
Listen without getting defensive, acknowledge the emotion, and go back to what they wanted at the start. If the frustration comes from an expectation created by the image, own the part of the communication that was yours, without blaming yourself excessively. See follow-up with a dissatisfied patient and communicating a result below expectations.
How does Harmy help with this follow-up?
Harmy was designed for this moment. You add the actual result photo to the session, and the app aligns it by the eyes so the framing is comparable. Then you can compare what was projected with what happened.
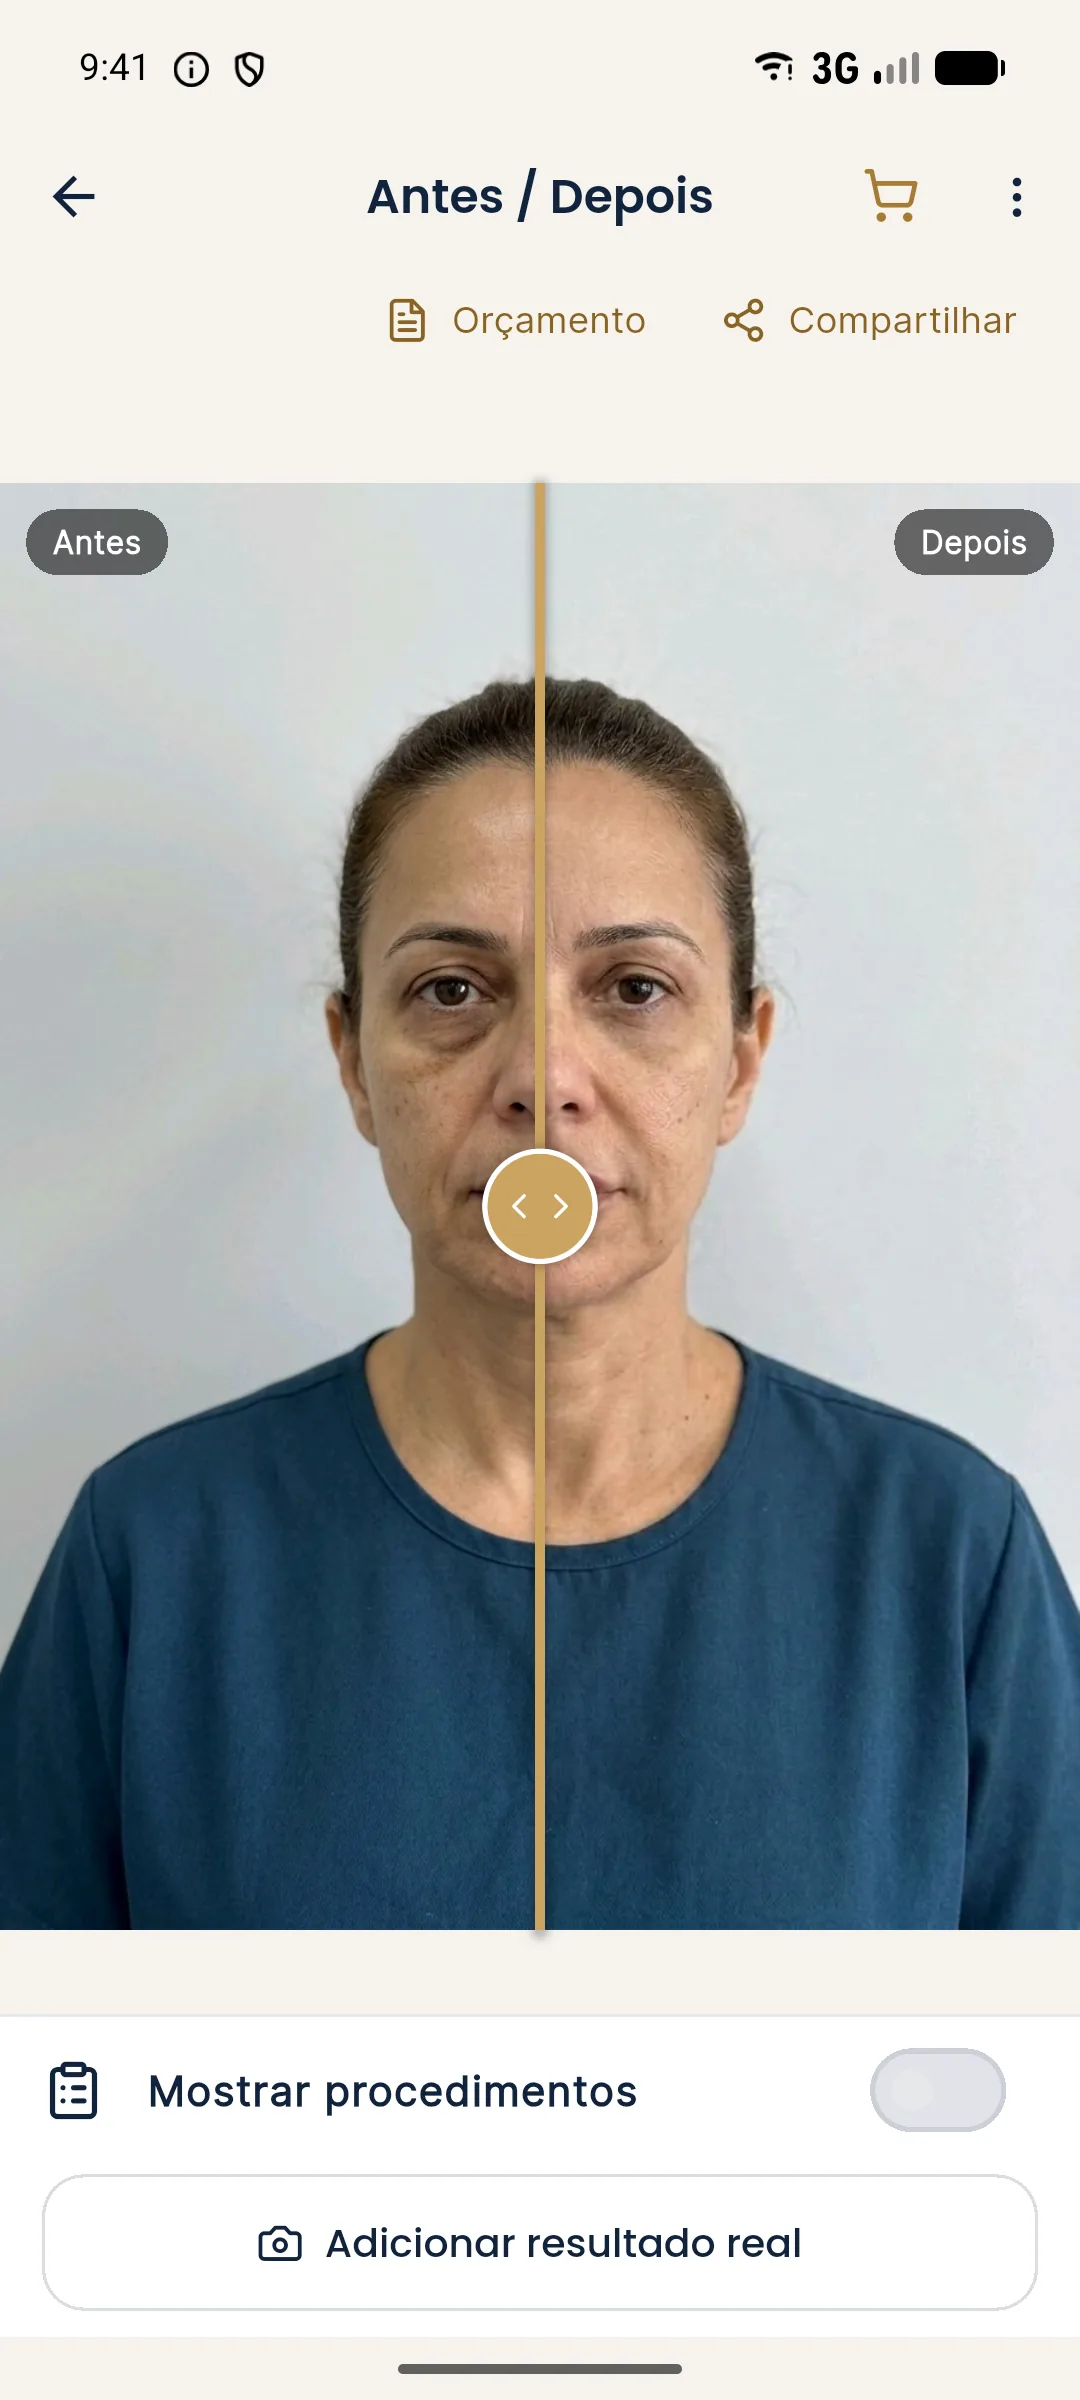
See also the usage page history and actual result.
What should you record?
Record the date, the actual photo (with permission), what the patient noticed, the differences from the simulation, what was explained, and the plan going forward. See recording risk communication and asking the patient for image consent.
Handled honestly, the comparison between simulation and reality strengthens trust. The patient sees that you do not hide differences and that the simulation served a conversation, not a promise.
How do you use the comparison to improve your next plans?
Besides talking with the patient, the comparison teaches you. Notice where the projection tended to be bolder or more discreet than the actual result, in which areas and with which volumes. Over time, you calibrate what to show and how to explain it. There is no universal rule: the learning is yours, with your style and your patients.
It is also worth keeping an internal note of recurring differences, to adjust the notice you give before showing the image. If the patient tends to expect more than the simulation indicates, reinforce the notice. See illustrative simulation notice to the patient.
Frequently asked questions
Does the actual result have to match the simulation?
No. The simulation is an illustration and does not promise results. Differences are expected, and the comparison is for conversation, not for holding anyone to account.
How do I show the comparison without causing frustration?
Go back to the notice that was given, calmly show the similarities and differences, and focus on what the patient wanted and what actually changed.
Should I show the simulation at the follow-up?
If it helps the conversation, yes, with the context that it is an illustration. If the patient is dissatisfied, first assess whether the image helps or makes things worse.
How do I photograph the actual result?
Under the same conditions as the before photo: light, distance, position, and expression. That makes the comparison fairer.
Harmy images are illustrative simulations generated by AI from the patient's photo to support the conversation between practitioner and patient. They are not a promise of results. Indication, technique, product and volume are solely the decision of the licensed practitioner. This content is for information only and does not replace a clinical assessment.