
What Show procedures does in Harmy

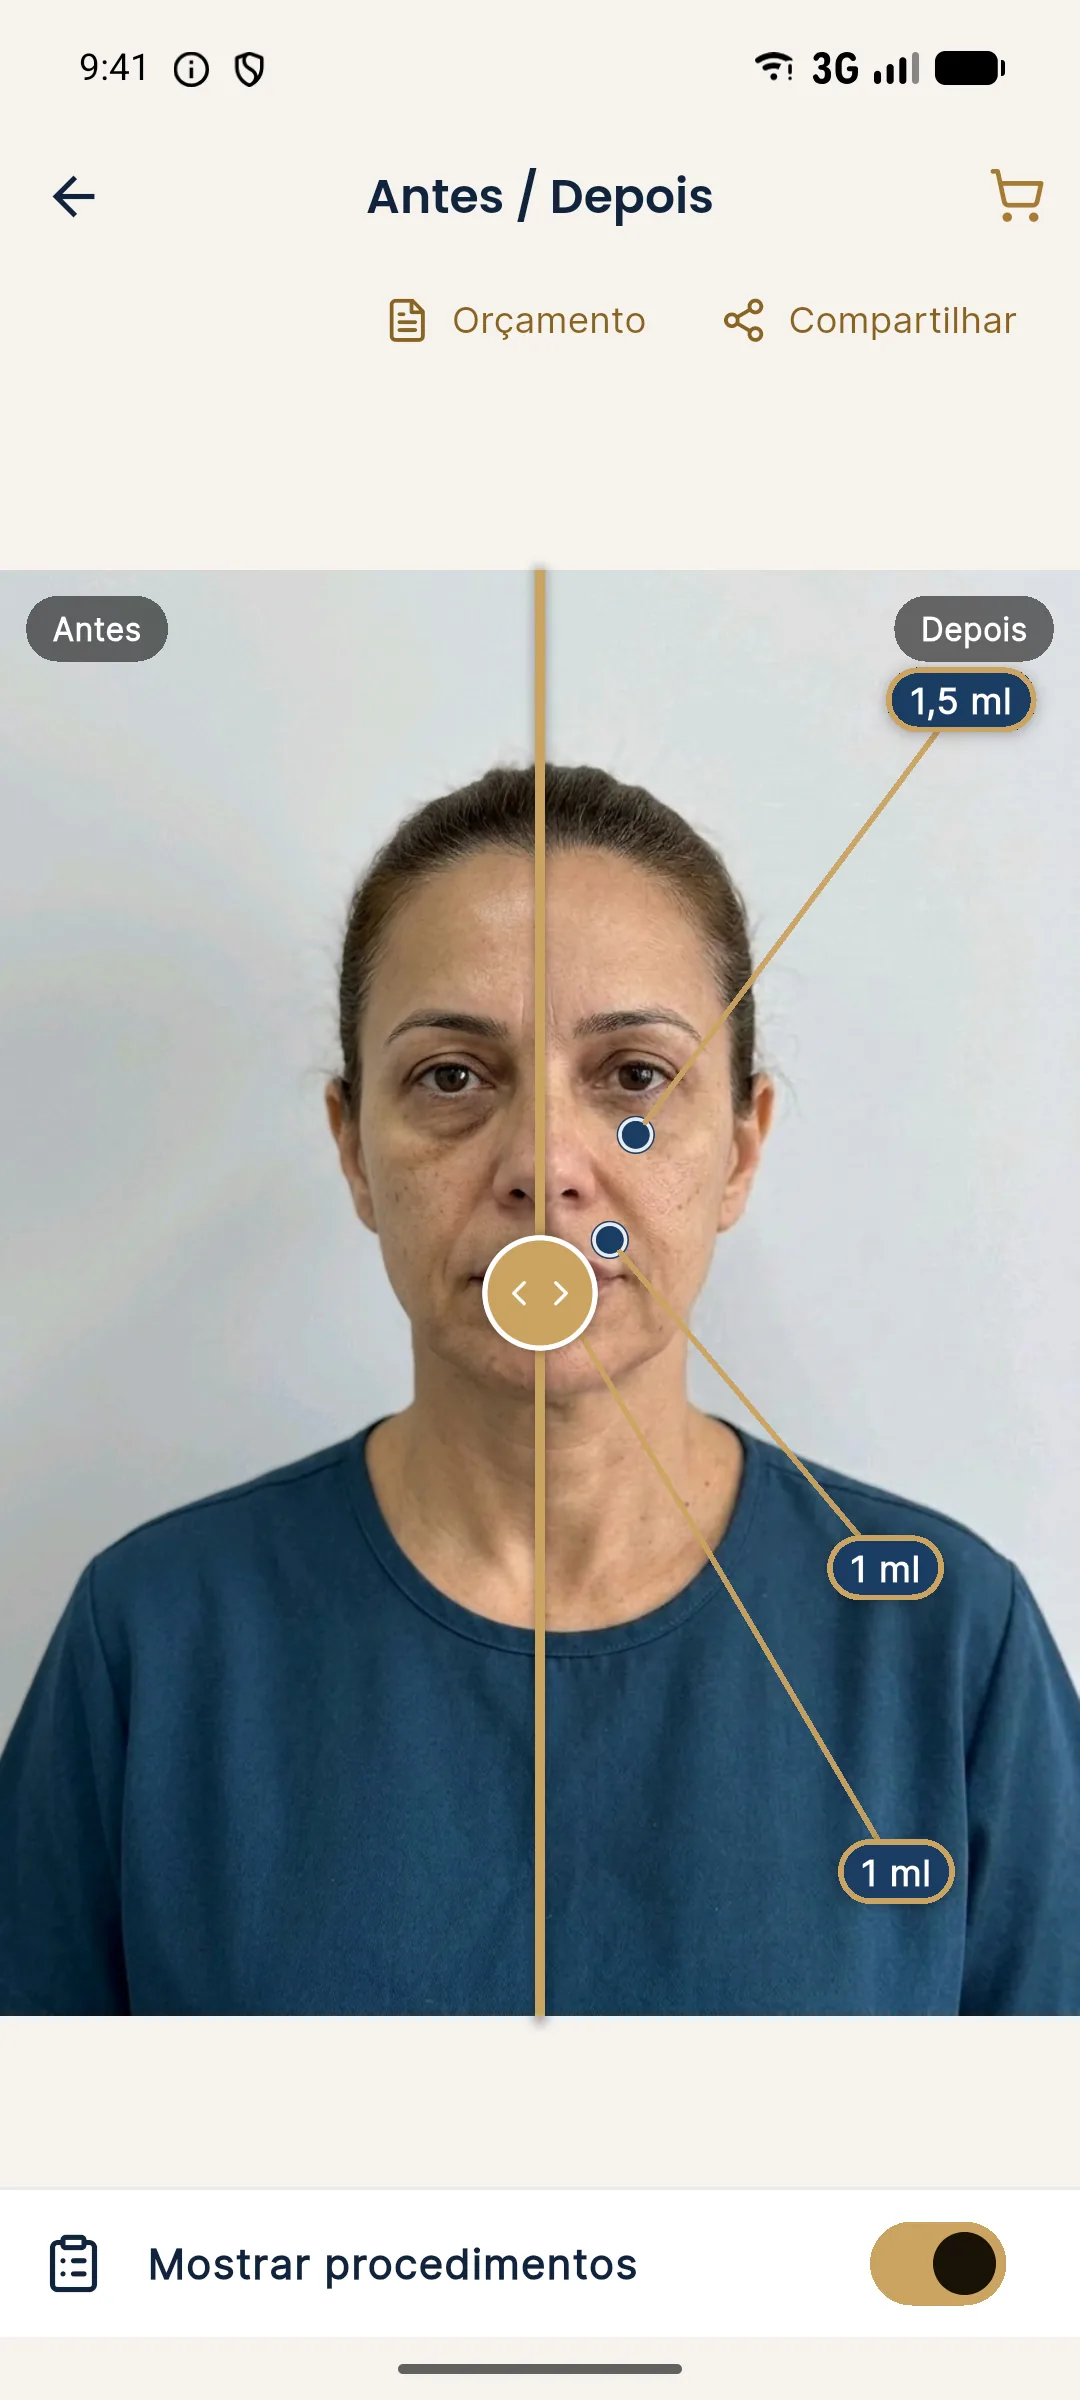
On the Before / After screen, the slider grabs the attention, but there is a discreet button that changes the conversation: Show procedures. It places the areas that were marked, and the ml for each, over the After image. It seems like a detail, but it is what turns a "pretty" image into an explainable one.
What exactly does it do?
When you tap Show procedures, the app displays over the After the list of the plan's areas with the ml for each. The image itself does not change: the After stays the same, it just gains a layer of information. Tapping again hides the layer.
When to use it in the consultation?
Think of three moments when the layer helps:
- When explaining what was simulated. The patient sees that each area has an ml and understands that the image is not "magic".
- When moving on to the quote. The list of areas and volumes is the natural bridge to the price per area.
- When reviewing with another professional. It eases the technical conversation about the plan.
And two moments when it may be worth hiding:
- First impression. Let the patient react to the Before / After without numbers competing.
- Price-focused patient. Seeing ml can bring the negotiation forward too early.
| Moment | Show procedures? | Reason |
|---|---|---|
| First look at the slider | Usually not | Avoids anchoring on numbers |
| Explaining the plan | Yes | Links image and volume |
| Preparing the quote | Yes | Connects plan and price |
| Sharing the image | Check first | Verify what goes out on the image |
Is the ml shown the dose?
No. The ml is the parameter the projection was generated with. The actual dose is the decision of the qualified professional, after clinical assessment. Make that clear to the patient when you show the numbers.
How it fits with the rest of the app
Show procedures works well with the Before / After slider and with the quote by ml. For the complete wrap-up flow, see Before / After and sharing. If on review the image looks different from what you marked, check projection different from expected.
Summary
Use Show procedures like a caption: when it helps explain, turn it on; when it gets in the way of the first look, turn it off. It is a communication feature, not a clinical decision tool.
Questions patients tend to ask
When the procedures layer appears, the first question is almost always about the numbers: is that ml a lot? Answer that the ml is a reference for the simulation, that it varies from person to person and that the real amount depends on the assessment. Avoid comparing with other patients or saying it is little or much, because that becomes an implicit promise.
The second question is usually about price. It is the natural moment to move on to the quote by ml, if you want to continue. If you prefer to postpone the subject, turn the layer off and go back to the slider.
The third is whether an item can be taken out. It can: go back to the Plan, remove the area, adjust the ml and create another projection. That uses one more R$ 3.99 credit, so it is worth agreeing with the patient before redoing it. For the overall flow, see marking areas and volumes.
Frequently asked questions
What does Show procedures display?
It shows the marked areas and the ml for each one over the After image, so the patient can see what the projection represents.
Does Show procedures change the projection image?
No. It is a layer of information over the After. The image itself stays the same.
Should I show the procedures to the patient?
It depends on your consultation style. Showing them helps explain what was simulated, but visible ml can turn into a price debate. It is your call.
Does Show procedures work in presentation mode?
Presentation mode is a full screen with only the slider, for turning the phone toward the patient. Use Show procedures before or after, depending on what you want to display.