
How to mark areas and volumes in ml in Harmy

Marking is the step where you translate your treatment plan into Harmy. The app shows the points for each area over the patient's photo, you choose which ones you will treat and set the volume for each. That information guides the AI when it generates the projection, and it later fills in the quote.
What is marking for?
Marking tells the AI where to change and by how much. The projection alters only the marked areas and keeps the skin, expression, background, hair and lighting. The volume in ml sets the intensity: the more ml, the more noticeable the change. That is why Harmy projections tend to be subtle and realistic, close to what a plan with that volume can show.
How does the app find the face?
When you open the marking screen, Harmy analyzes the photo on the device itself and calculates the facial contours. From them it places one point for each area, linked by a line to a label with its name. These contours are not stored. They are an approximation for viewing and selection, not a clinical measurement.
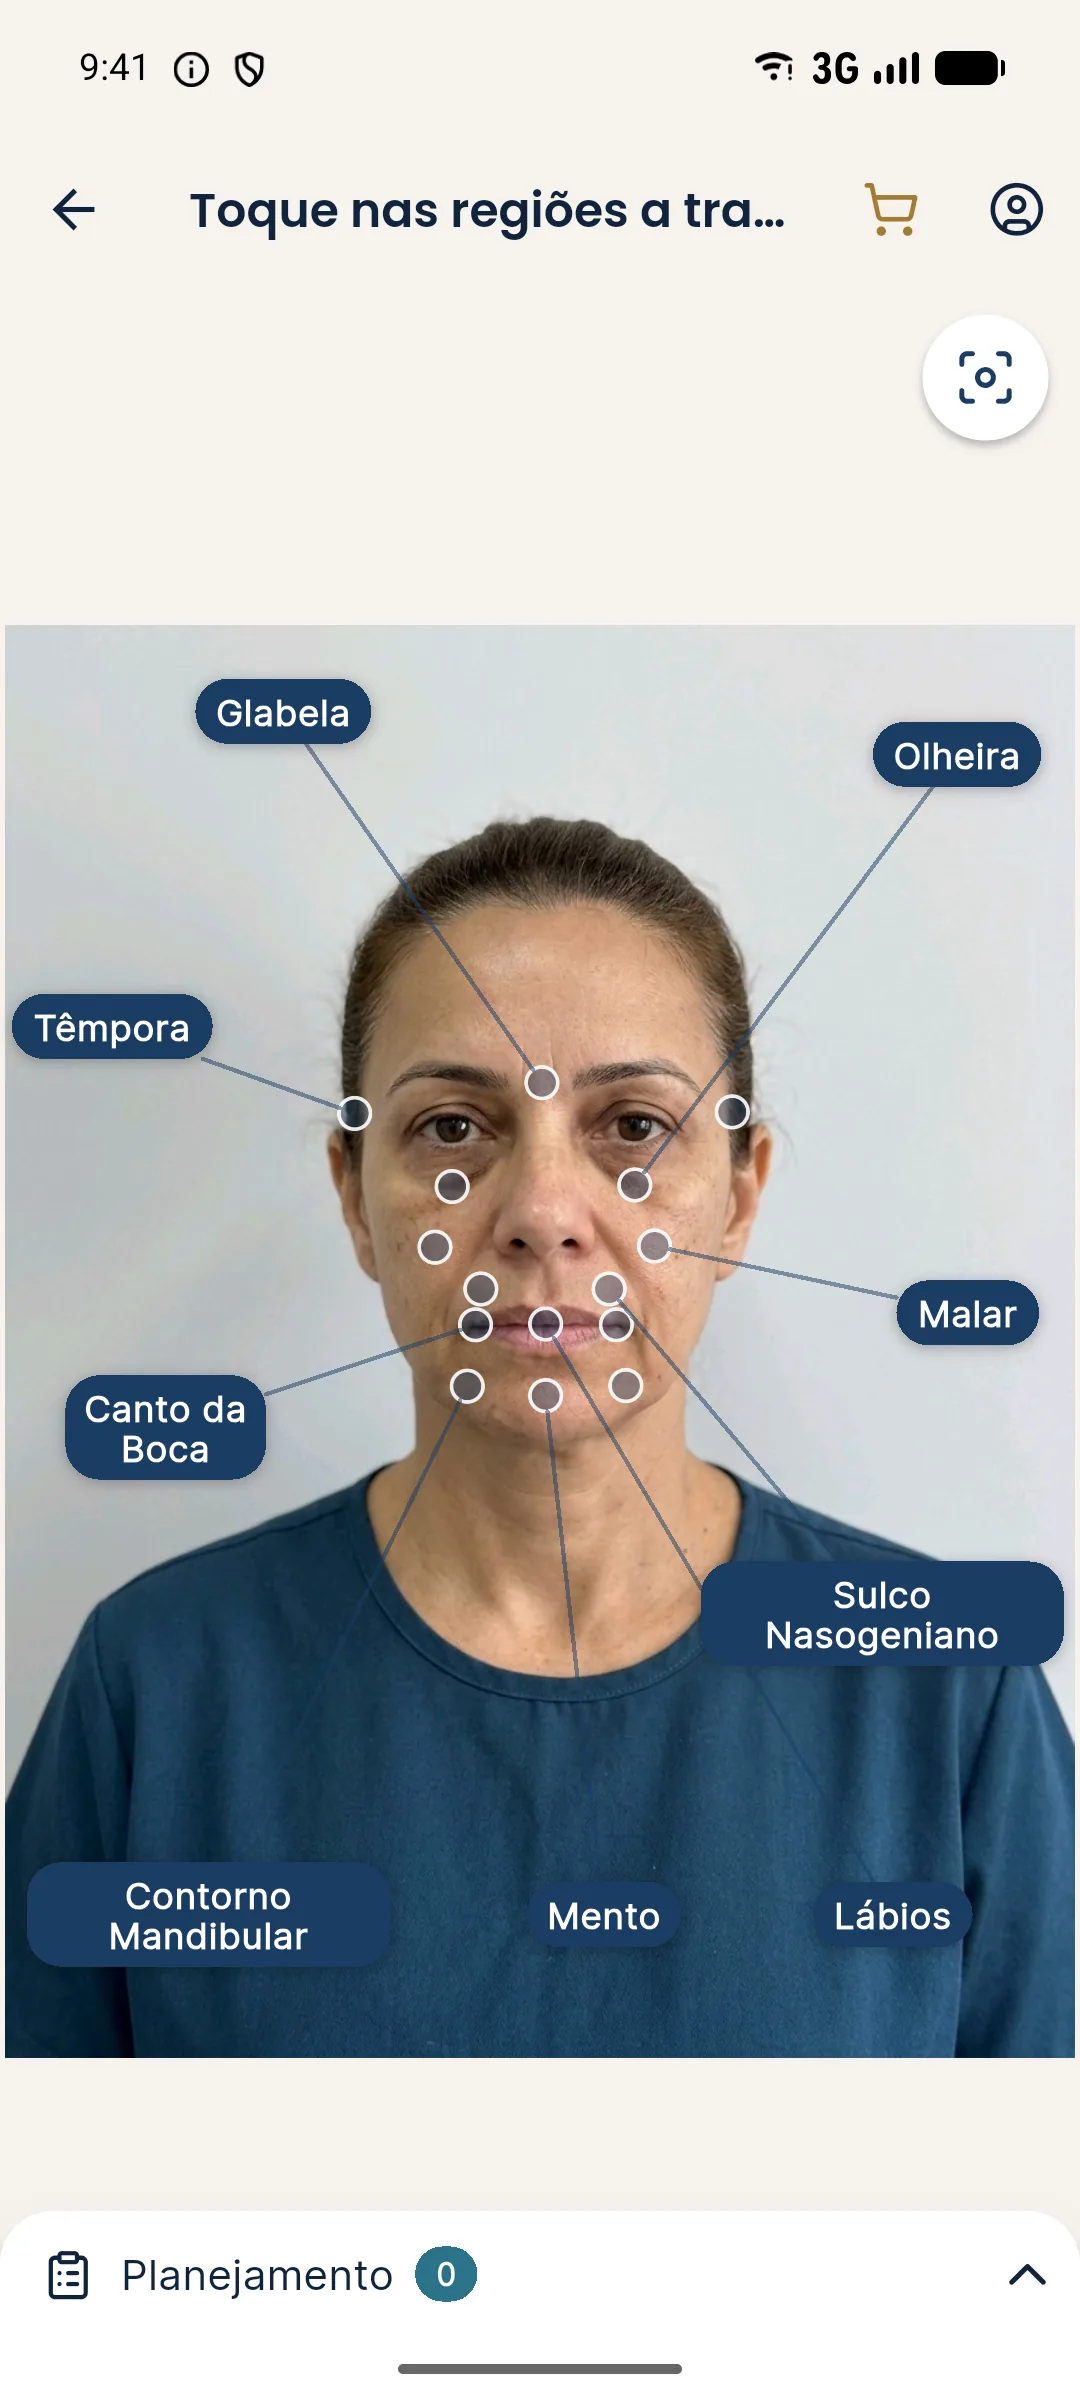
Which areas appear on the marking screen?
| Point in the app | Area page |
|---|---|
| Glabella | glabella |
| Temple | temples |
| Tear Trough | tear troughs |
| Cheekbone | malar |
| Nasolabial Fold | nasolabial fold (smile lines) |
| Mouth Corner | mouth corners |
| Lips | lips |
| Chin | chin |
| Jawline | jawline |
Step by step
- With the photo approved, the Tap the areas to treat screen opens with all the points.
- Tap the point or the label of an area. The point fills in, the label gets a gold border and the area goes to the Plan at the bottom. The number next to Plan shows how many areas are marked.
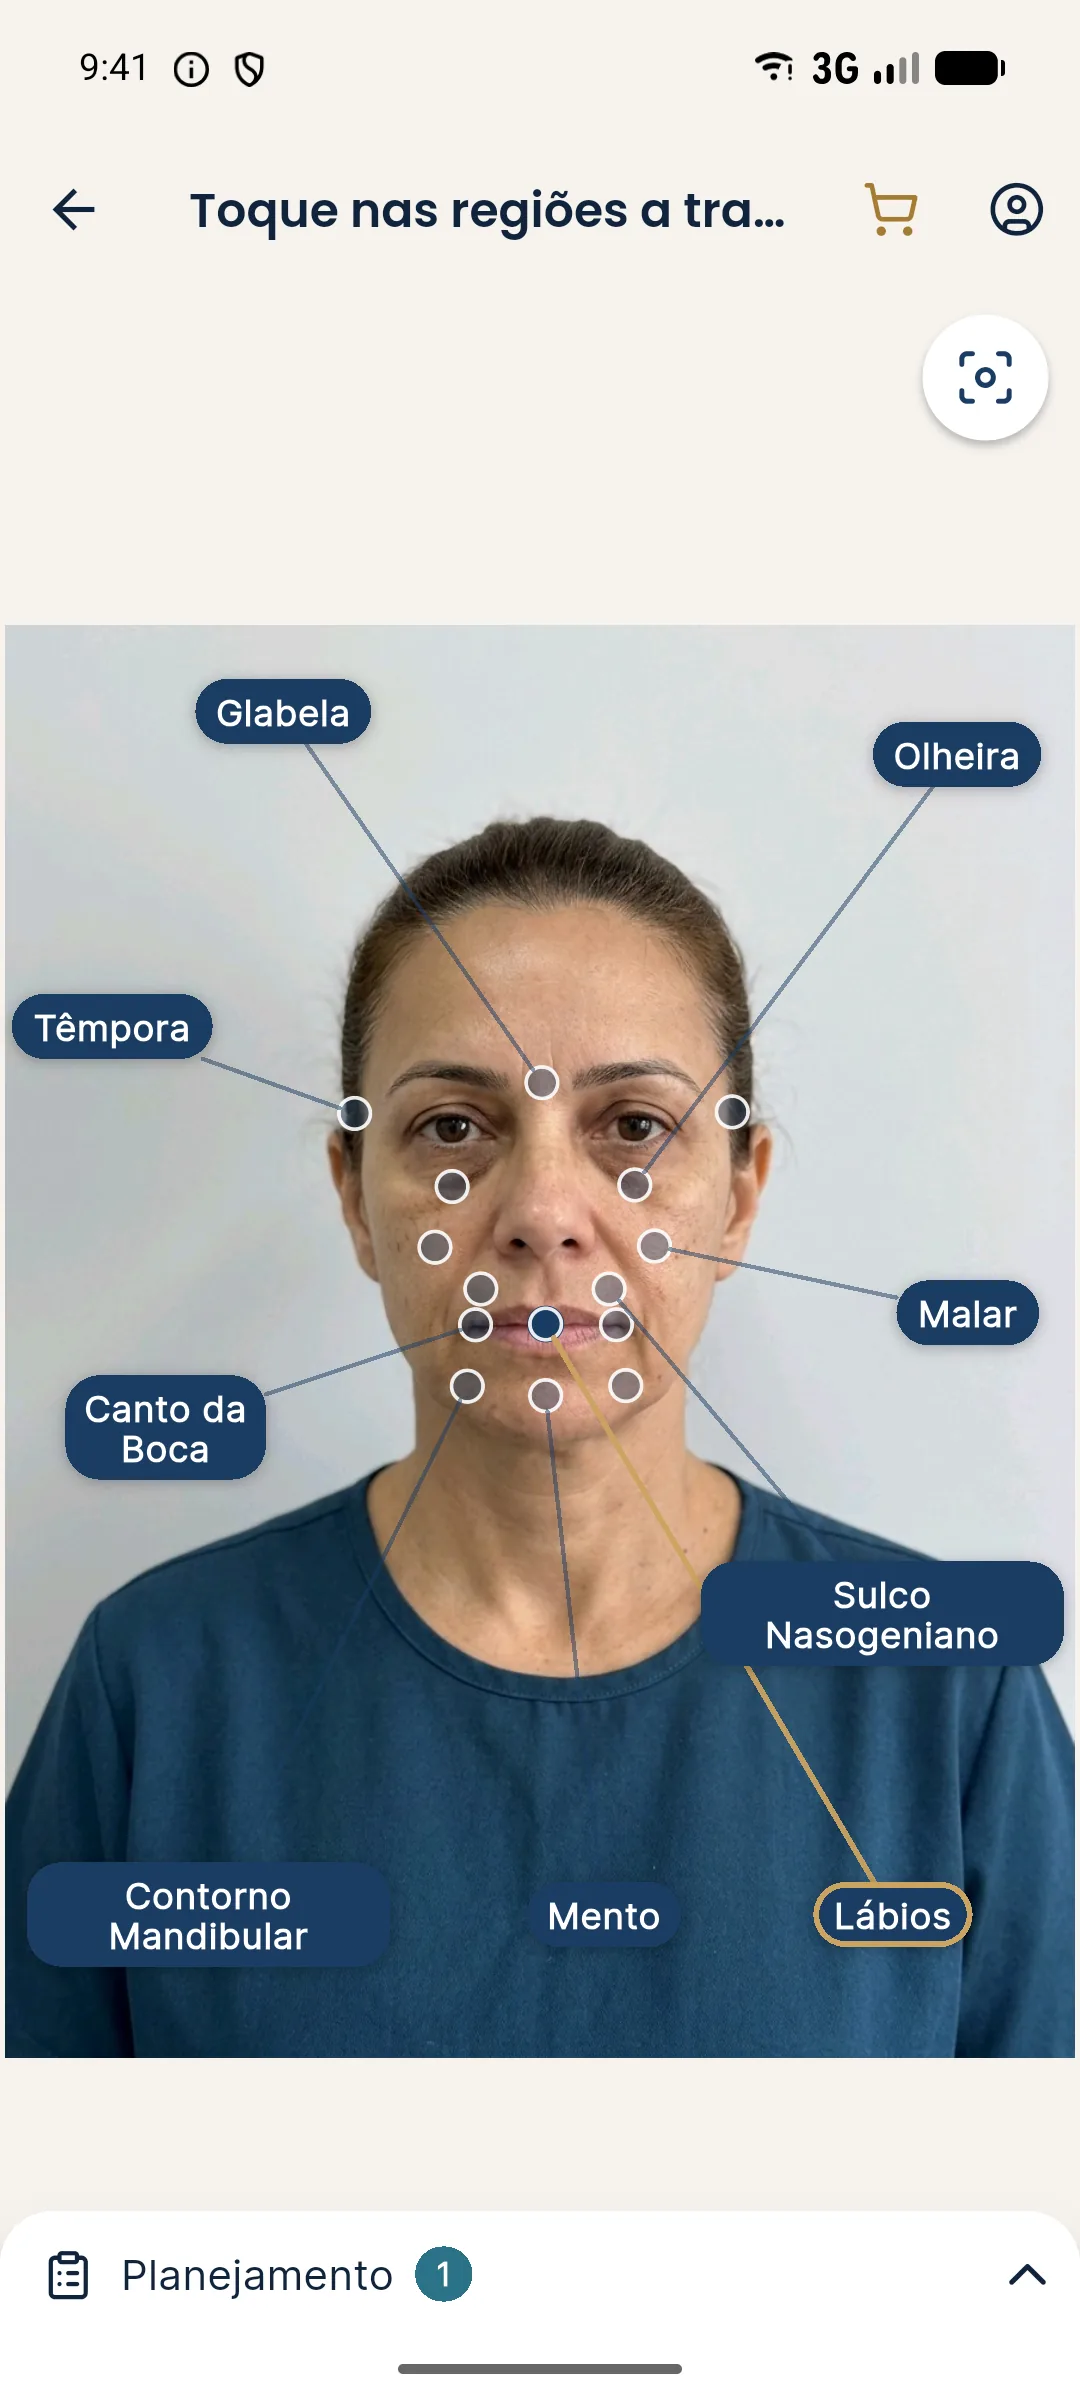
- To unmark, tap the same point or label again.
- If you need a closer look, use two fingers to zoom in on the photo (up to 4 times) and drag to move it. The button in the top right corner re-centers the image.
- Open the Plan by tapping the arrow at the bottom. Each area appears with its current volume, which starts at 1 ml.
- Adjust with − and +. The step is 0.5 ml, from 0.5 to 5 ml per area.
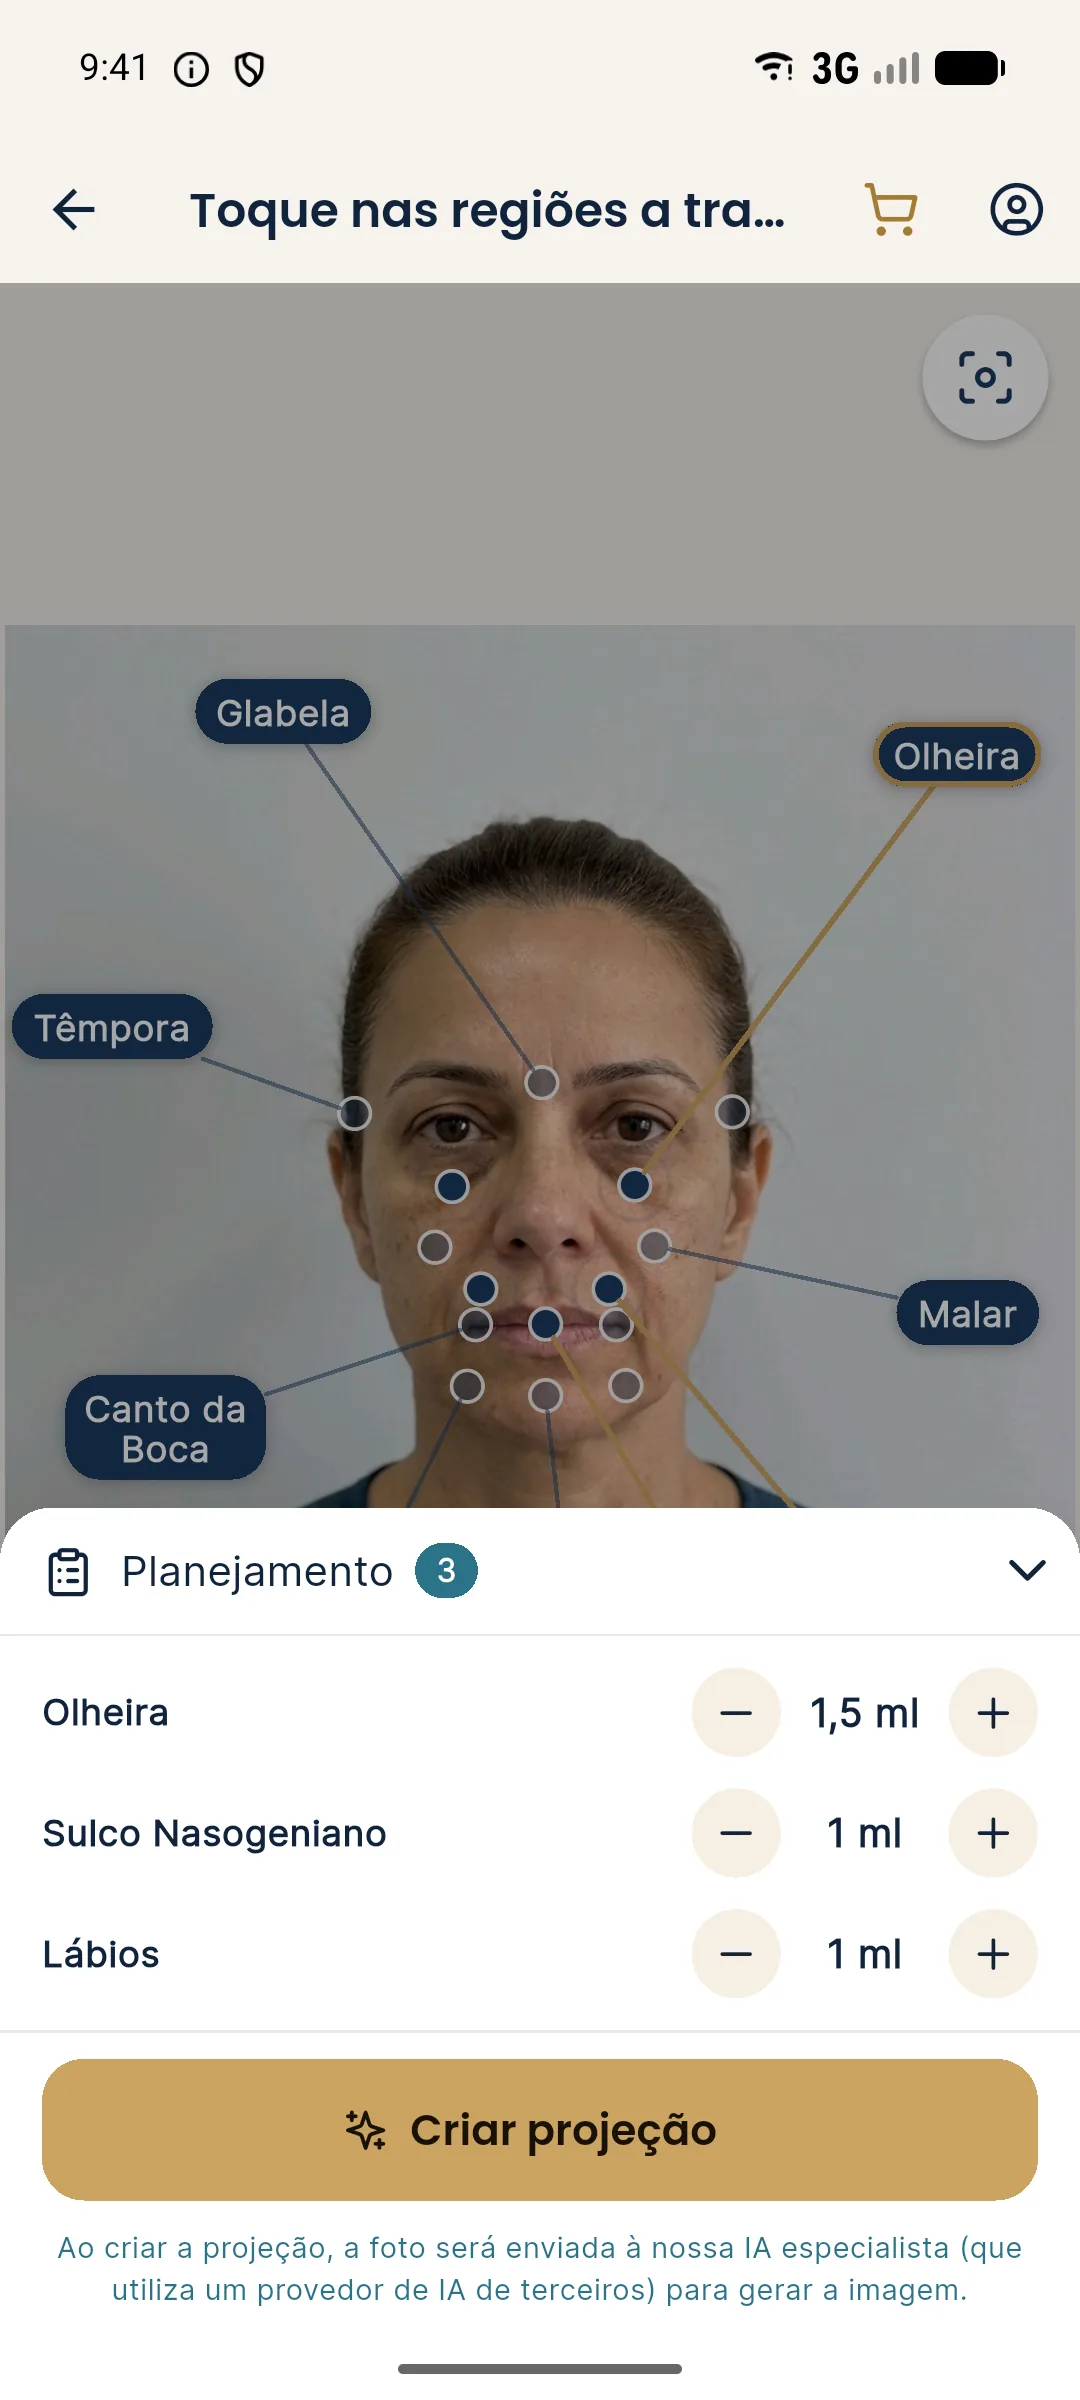
- Tap Create projection. Below the button is a notice that the photo will be sent to a specialist AI, which uses a third-party AI provider, to generate the image.
How do you enter the volume for bilateral areas?
For areas that exist on both sides of the face, such as tear trough, malar or nasolabial fold, the ml you enter is the total, and the projection splits that volume between the two sides. If your plan is 1 ml per side, enter 2 ml. The Glabella uses the same control, with a symbolic value that indicates intensity, since botulinum toxin is not measured in ml.
Tips
- Mark the plan you are going to propose, not the maximum possible. Marking extra areas moves the projection away from the quote.
- Use the volumes you would actually inject, within the usual range and at your discretion after assessment. An inflated volume creates an expectation the consultation cannot support.
- Check the Plan count before creating the projection, especially if you used zoom and tapped near two points.
- If you leave the app midway, the draft with photo, areas and volumes is saved, and the home screen offers to resume it.
Common mistakes and how to fix them
| Situation | What to do |
|---|---|
| "Could not detect the face" | Go back and retake the frontal photo, well lit. See standardized frontal photo. |
| I tapped and it marked the wrong area | Tap again to unmark and use zoom to hit the right point, or tap the label directly. |
| The area I am looking for has no point | The app has nine points. Areas such as the nose and forehead lines have no point of their own on the marking screen. |
| The − button will not go below 0.5 ml | That is the minimum. To remove the area, unmark the point. |
| "Not enough credits" | Buy credits. Your marking stays saved and the app returns to it when the credit arrives. |
Next step
After creating the projection, learn how to present and send the image in Before / After and sharing.
Frequently asked questions
Which facial areas does Harmy let you mark?
Glabella, Temple, Tear Trough, Cheekbone, Nasolabial Fold, Mouth Corner, Lips, Chin and Jawline.
What are the minimum and maximum volumes per area in Harmy?
The volume ranges from 0.5 to 5 ml per area, in 0.5 ml steps. Each area starts at 1 ml when it is marked.
In a bilateral area, is the Harmy ml per side?
No. For areas on both sides of the face, the ml you enter is the total, split between the two sides in the projection.
Does the volume in ml change the projection?
Yes. The AI respects the volume you enter, so the more ml, the more noticeable the change in the area tends to be.