
How to Use the Zone Map in the Conversation With the Patient
Quick facts
- Goal
- Show the plan by area and make clear that the patient can remove items
- Rule
- Each area must be tied to a concern the patient has voiced
- App points
- Glabella, Temple, Tear Trough, Cheekbone, Nasolabial Fold, Mouth Corner, Lips, Chin, Jawline
- Note
- The map supports the conversation; the decision belongs to the patient
When the consultation reaches the planning stage, the patient needs to see the plan. A spoken list of areas, volumes and products is hard to retain, and the result is a patient who nods without really understanding what will happen. The zone map solves this: it turns the plan into something visual, area by area, tied to the concern.
But the map also carries a risk. The more areas that appear, the greater the chance that the patient leaves with the impression that their face has many problems. The right use is selective and conversational.
What is the zone map?
It is a view of the face divided into treatable areas, where you point to where something will be done. In practice it can be a drawing, a photo with markings or an app screen. In any format, it should answer three questions from the patient:
- Where exactly will it be done?
- Why there?
- What does it change, and what does it not change?
The areas are also organized into thirds (upper, middle and lower), and understanding that logic helps explain the whole. See upper third, middle third and lower third.
How do I show the map without overwhelming the patient?
A few principles:
- Show only the areas in the plan. The rest stays out, unless the patient asks.
- Start with the main concern. The first area shown should be the one that prompted the visit.
- One area at a time. Explain each one before moving to the next.
- Use the patient's language. "The area around the eyes" before "tear trough."
- Pause and ask. After each area, check that it makes sense.
How do I tie each area to the concern?
This is the most important part. The patient only accepts the plan well when they can see the thread connecting what they said and what you propose.
| The patient said | Area on the map | How to explain |
|---|---|---|
| "I look tired" | Tear Trough | "Here the shadow can accentuate that look" |
| "My face lacks definition" | Jawline | "This area influences the definition of the contour" |
| "My smile looks sad" | Mouth Corner | "This area can influence the expression at rest" |
| "I've lost volume" | Cheekbone | "Here the volume usually gives support to the whole" |
| "My lips are thin" | Lips | "We can think in terms of proportion, not size" |
Each row ties concern, area and explanation without a promise. See the details of each area in Harmy's areas.
How do I let the patient remove items?
Letting the patient remove items is a sign of respect, and it often increases trust in the rest of the plan. To do it well:
- Say explicitly that they can remove any area.
- Explain, without pressure, how each removal affects the whole.
- Offer the option of doing it in stages.
- Record what was removed and why.
The use of stages is covered in staged simulation for the patient, and prioritization in the patient's priority list.
And how does the quote fit in?
If the map helps tie concern to area, the quote should follow the same logic. Each area on the map matches a line on the quote, and removing an area from the map removes the line. This keeps the conversation consistent. The script is in how to explain the quote by area.
How does Harmy organize the areas?
The app works with nine marking points: Glabella, Temple, Tear Trough, Cheekbone, Nasolabial Fold, Mouth Corner, Lips, Chin and Jawline. You tap the points of the areas to treat, set the ml for each one and the intensity, and create the projection.
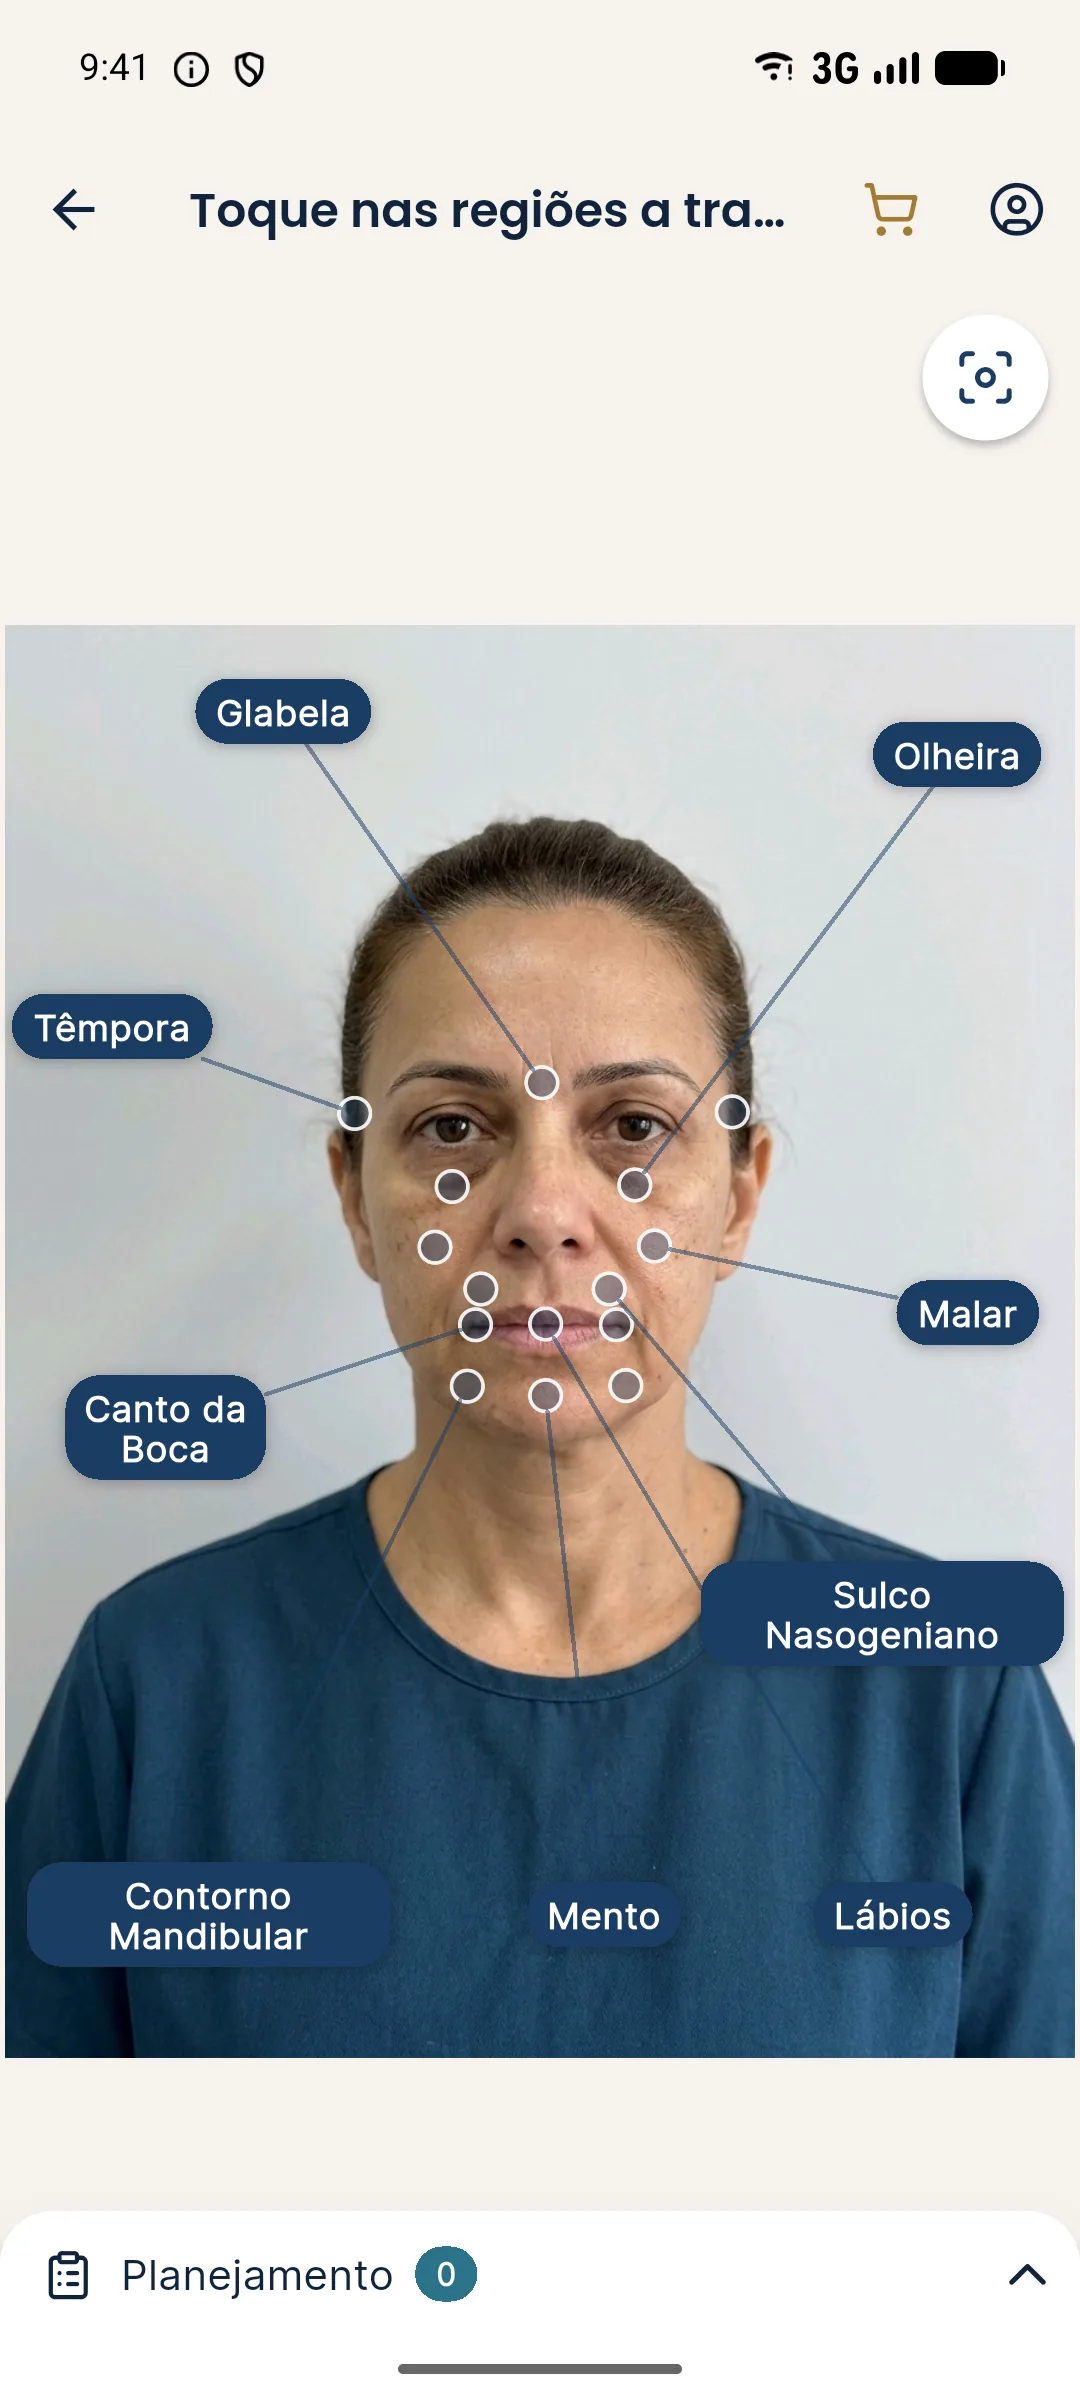
To get to this point, it helps to know how to mark areas and volumes.
What if the patient wants to add areas?
It happens, especially after seeing the projection. The answer depends on the reason. If it comes from a real concern, add it and redo the plan. If it comes from an impulse ("while I'm here, let's also do..."), it is worth slowing down and going back to the priorities. The topic appears in the patient asks for more in the simulation.
Checklist
A well-used map makes the plan readable. The patient leaves knowing what will be done, where and why, with control of the decision in their hands.
Frequently asked questions
What is the zone map in the consultation?
It is the visual representation of the areas of the face that are part of the plan, shown to the patient to tie each area to their concern and to what will be done.
Should I show the patient every area of the face?
No. Show only the areas related to their concerns and to the plan. Showing all of them lengthens the list of possible flaws and can lead to unnecessary procedures.
Can the patient take areas out of the plan?
Yes. Explain how removing each area affects the whole and respect the decision, recording the conversation.
How do I explain the order of priority of the areas?
Ask the patient what bothers them most and build the plan from there, indicating what is essential, what is complementary and what can wait.
Harmy images are illustrative simulations generated by AI from the patient's photo to support the conversation between practitioner and patient. They are not a promise of results. Indication, technique, product and volume are solely the decision of the licensed practitioner. This content is for information only and does not replace a clinical assessment.