
Facial map of the HOF plan: how to draw and label it
Quick facts
- Topic
- Visual convention for recording areas, ml, and legend on a single map
- Goal
- Any professional reads the same plan without asking
- Elements
- Areas, ml per area, intensity, order, and notes
- Care
- The map records the plan, it does not teach technique
A plan that exists only in the head of whoever made it is not a plan, it is a memory. When another professional takes the case, when the patient returns months later, when you yourself need to remember why you decided on less on one side, it is the record that speaks. The facial map is the fastest way to record, as long as it follows a convention. Without one, it becomes a scribble.
This page proposes a convention for drawing and labeling a facial map: what goes in, how to mark, which colors and abbreviations to use, and how to check that it is readable. For the set of fields in the plan, see facial treatment plan sheet: fields and abbreviations and notation in the facial harmonization plan.
What should a facial map record?
The map answers four questions in a few seconds: where, how much, why, and in what order. Everything beyond that goes in the text of the plan.
| Element | What to record | Example of use |
|---|---|---|
| Area | Which area is in the plan | Cheekbone, lips, chin |
| Amount | Planned ml, range, and side | 1.0 to 1.5 ml in total |
| Goal | What you want to see | Support the midface |
| Intensity | The desired visual effect | Subtle, Moderate, or Pronounced |
| Order | Which decision comes first | 1, 2, 3 |
| Note | A precaution or doubt about the case | Prior asymmetry on the right |
Notice what is not on the list: exact injection point, plane, depth, or technique. That belongs in the technical record of the procedure, not in the plan map the patient may see.
How do you divide the face on the map?
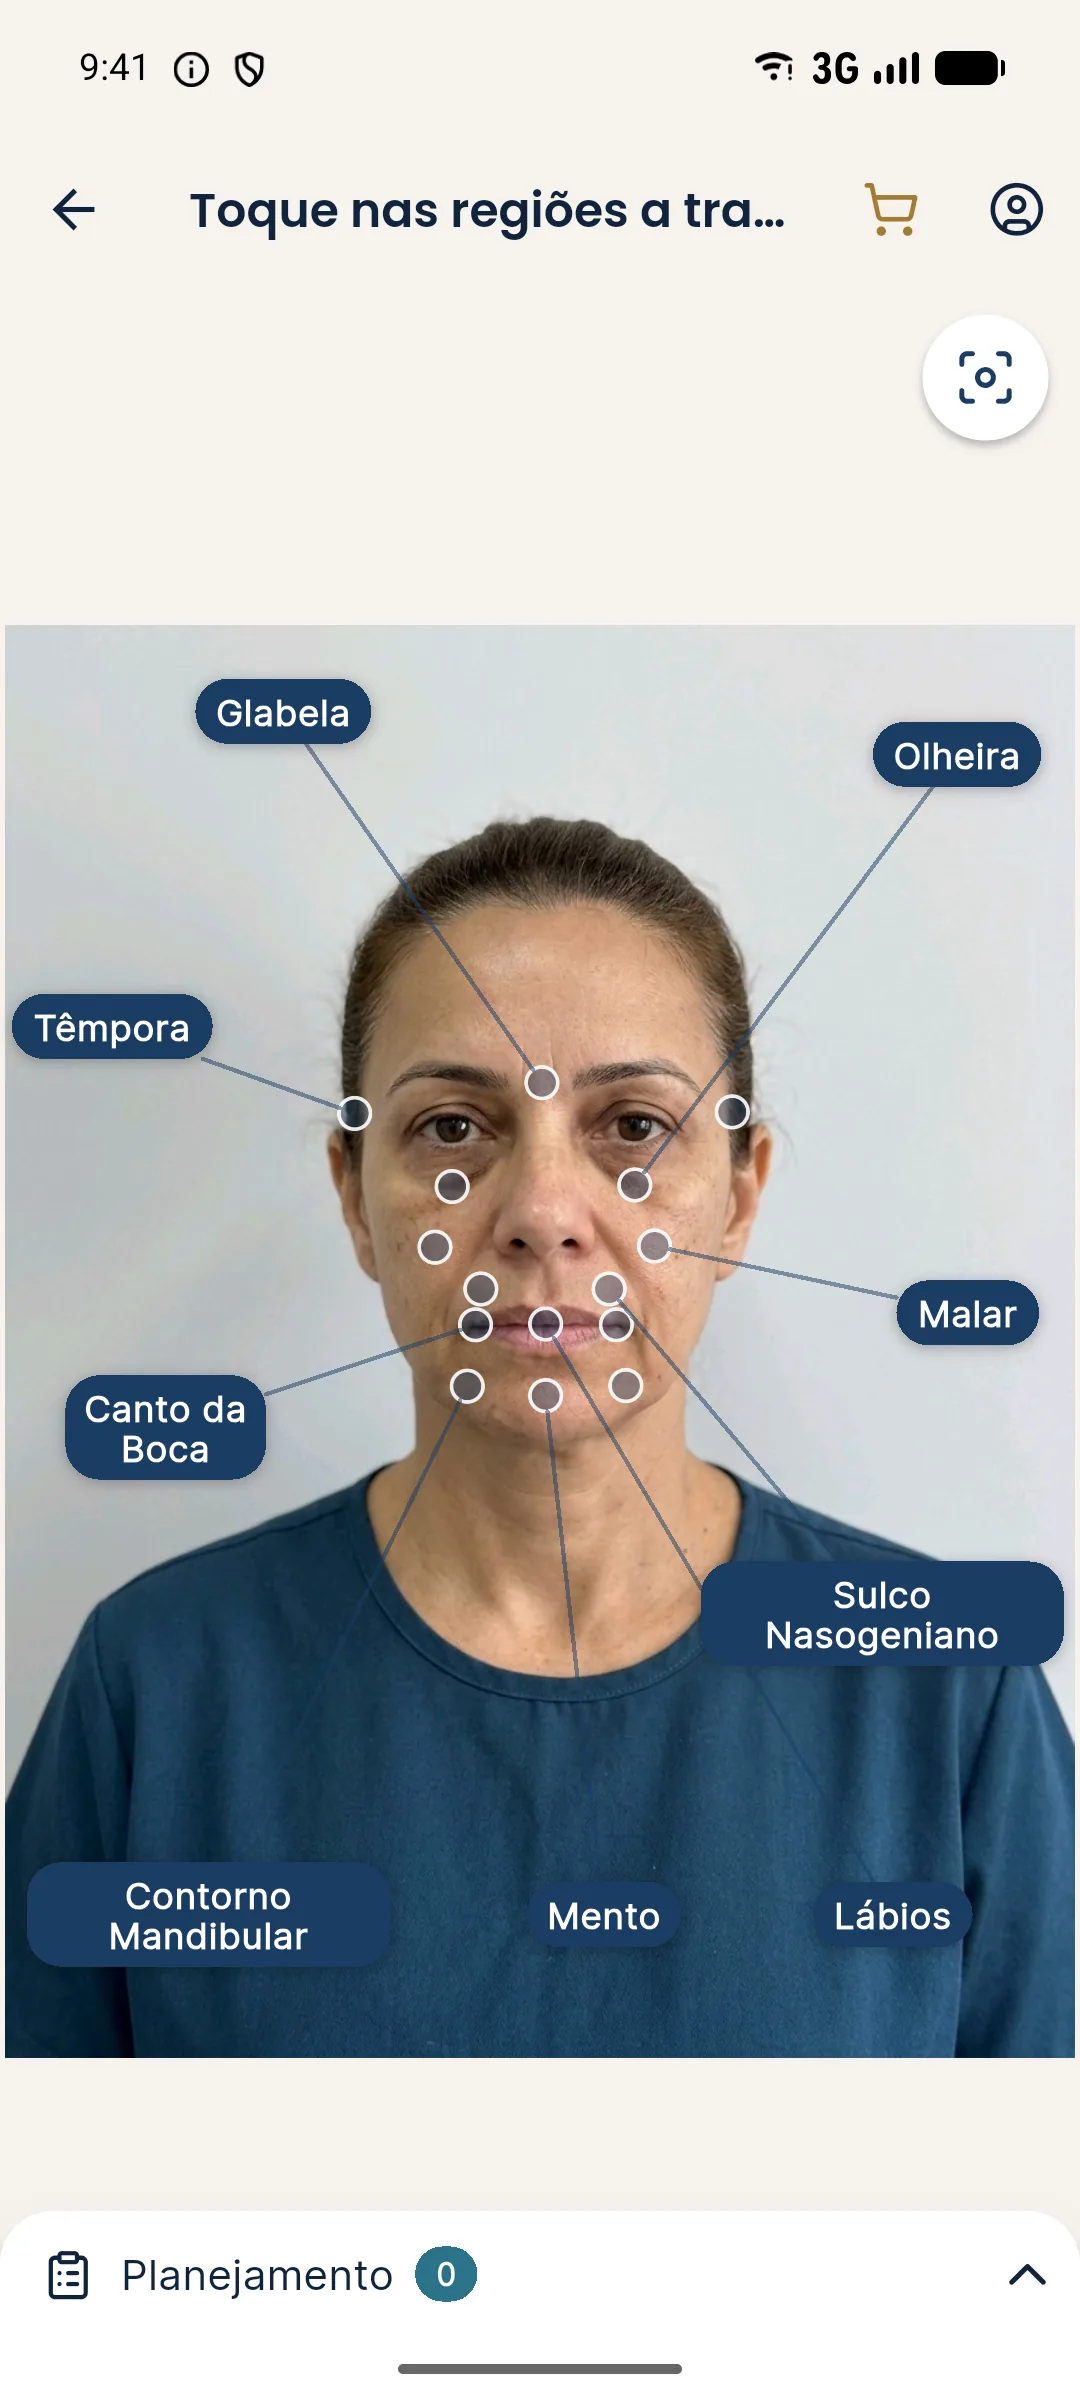
Use few areas, clear ones, that match those in your reasoning. A division into three large blocks, followed by areas within each, works well:
- Upper third: glabella, forehead area, temples.
- Middle third: under-eye area, cheekbone, nasolabial fold, nose.
- Lower third: mouth corners, lips, chin, jawline.
This division is the same as in facial assessment by thirds, in facial assessment by thirds. Aligning the map with the clinical reading saves translation between what is seen and what is recorded.
How do you label without confusion?
The legend is what makes the map independent of whoever drew it. Fix it for the clinic and always use the same one.
A suggestion for colors, as an example and with no normative value: one color for volume areas, another for short-cycle areas, and a third for areas under observation. What matters is that it is always the same. For the order, use criteria, as in what to treat first in facial harmonization: priority criteria.
Paper map or over the patient's photo?
Both have uses. Paper is quick, works at the moment of assessment, and does not depend on a device. The patient's photo with markings is truer to their face and easy to file. In both, keep the same convention.
When using the photo, its quality matters. A level head, neutral expression, and even lighting keep the marking from relying on shadows. See standardized frontal photo and neutral expression in the planning photo.
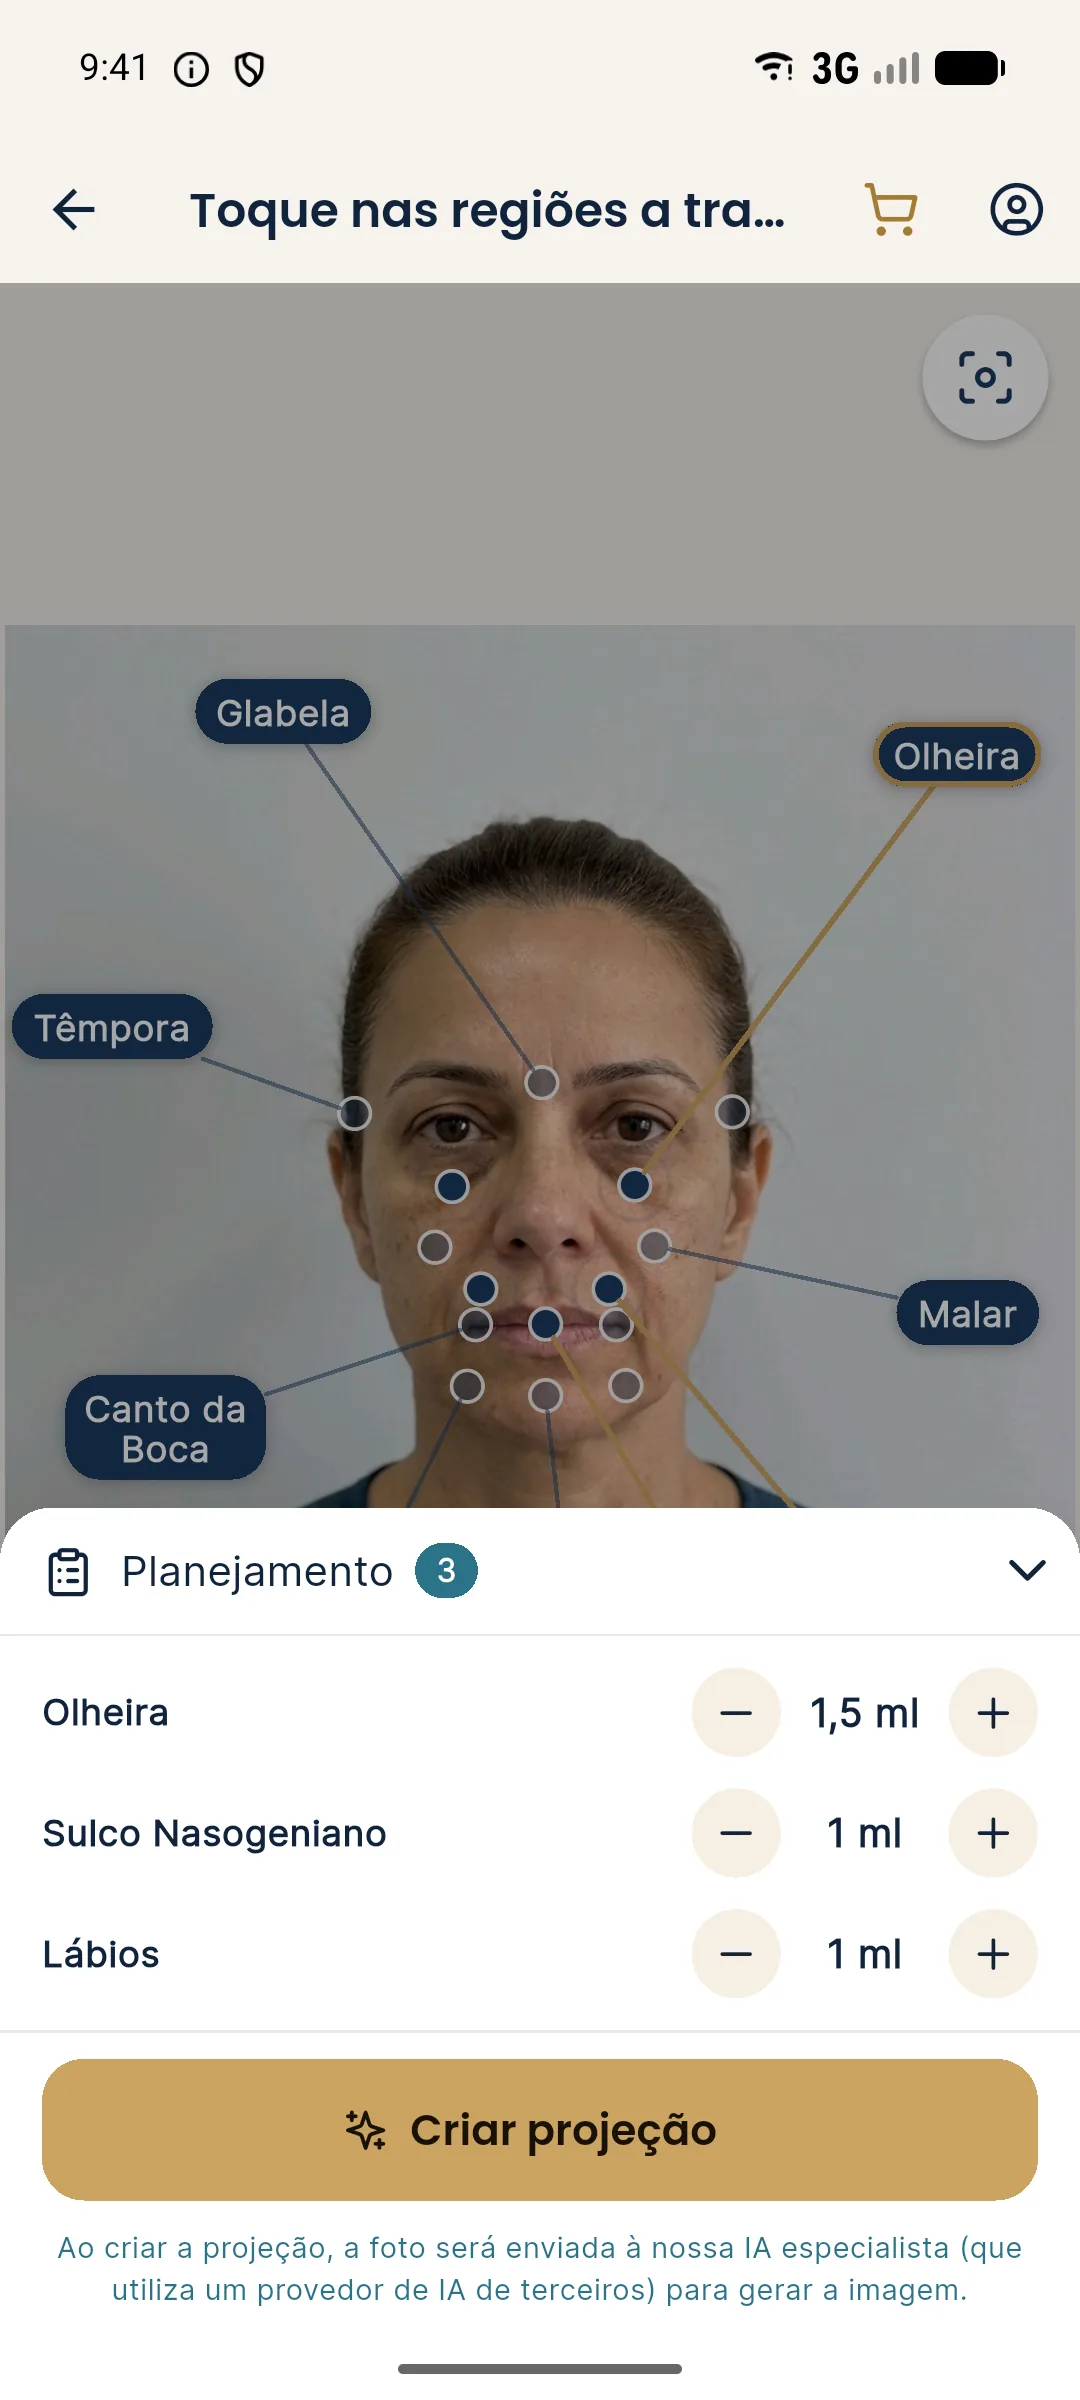
This set works as a digital map, with a built-in legend: area, ml, and intensity. The "Show procedures" screen displays the ml of each area over the After image. It is useful as a visual record of the plan, but it is an illustration and not a technical record of the procedure performed. If you want a record of what was done, use your patient record.
How do you check that the map is readable?
A simple test: hand the map to a colleague who was not in the consultation and ask them to explain the plan out loud. If they get it wrong or hesitate, the convention is missing. Fix the legend before the next case.
Another test is the six-months-later one. Take an old map and see whether you understand what you decided and why. When you do not, the goal field is missing. See handing a plan over between professionals in the same clinic for the minimum information to pass on.
What mistakes ruin a facial map the most?
Some habits always show up and take away the value of the record:
- Map with no date: impossible to know which moment of the face it refers to.
- Volume with no unit or side: "2" could be 2 ml total, 2 ml per side, or 2 units.
- A different legend in each case: every drawing requires a translation.
- Too many arrows and notes: what matters gets lost in the middle.
- A map that only shows what will be done: it lacks the areas that were assessed and deliberately left out, which explain the plan.
Recording what was assessed and not treated is as valuable as recording what was treated, because it keeps a colleague, or you yourself, from repeating the doubt at the next consultation. This ties in with the idea of findings the patient did not ask about in the plan, where the record protects the decision not to intervene.
Every decision on area, product, and volume rests with the qualified professional, after assessment. Maps and simulations are illustrative and do not promise results.
Frequently asked questions
What should a facial planning map include?
The division of areas, the planned ml in each, the intensity or goal, the order of decisions, and a legend. The map should be readable by any professional in the clinic.
Do I need to draw by hand or can I use the app?
Both work. Hand drawing is free-form, and Harmy generates the area marking over the patient's frontal photo, with ml and intensity, which can also serve as a record.
Can the map show injection points and depths?
This page does not teach technique. The plan map records areas, volumes, and goals. Points, planes, and depths belong in the professional's technical record.
How do you keep each professional from using different symbols?
By defining a single legend for the clinic, with fixed colors and abbreviations, and attaching it to every map.
Harmy images are illustrative simulations generated by AI from the patient's photo to support the conversation between practitioner and patient. They are not a promise of results. Indication, technique, product and volume are solely the decision of the licensed practitioner. This content is for information only and does not replace a clinical assessment.