
Under-eye photo for documentation: light and angle

- Highlighted area
Quick facts
- Light
- Soft and slightly overhead, no harsh shadow under the eyes and no flash.
- Angle
- Lens at eye level, chin slightly raised, gaze on the horizon.
- Poses
- Frontal at rest and, if useful, with the gaze slightly down or the chin higher.
- Caution
- Dark-circle color depends on white balance; tear trough shadow depends on the light.
Few areas change as much with light as the under-eye region. A hollow under the eye becomes a deep shadow under overhead light, almost disappears under frontal light, and can look purple, brown or bluish depending on the camera's white balance. That is why the question "did it improve?" only has an answer when the before and after photos were taken under the same conditions.
This page covers the light, angle and color standard for documenting under-eye circles and the tear trough. The focus is on recording; the treatment decision belongs to the qualified professional, after assessment.
What does the photo need to show?
An under-eye circle is not one single thing. In general, three components add up: color (pigment or vessels), shadow (hollowing of the tear trough and the palpebromalar groove) and bag (fat and swelling). The photo needs to make clear which one dominates. This guides the conversation and avoids promising what the treatment does not deliver. The clinical classification is in under-eye circles: types and assessment.
Which light should you use?
Light is the variable that weighs the most. The ideal is soft, diffuse and slightly overhead light coming from the front, which outlines the hollow without creating an exaggerated shadow.
- Very high or ceiling light deepens the shadow under the brow and under the eye and exaggerates the circle.
- Strong frontal light or flash erases the shadow and gives the false impression of smooth skin. See phone flash in the clinical photo.
- Side light reveals the relief but creates asymmetry between the two sides.
- Window: diffuse natural light is great, as long as it is stable. Details in window as a light source.
Always document the light used (source position, type, distance). If possible, take a second photo with a different light direction, labeled, to show the shadow component. See also shadow on the face in the clinical photo.
Which angle and posture?
Small posture changes alter the under-eye look:
- Lens at eye level. A camera above the gaze flattens the tear trough, and below it deepens it. See camera height.
- Chin slightly raised. This exposes the area under the eye and reduces the brow shadow. Keep the Frankfort plane close to horizontal.
- Gaze on the horizon. Looking up opens the eyelid and pulls the skin; looking down creates shadow. See gaze on the horizon.
- Eyes naturally open. No squeezing or forcing.
- Hair away from the face and no glasses. See earrings, glasses and accessories.
And color?
Under-eye color ranges from brown to bluish and is very sensitive to white balance. Lock the balance with a gray card and turn off filters and retouching, as in white balance in the clinical photo and filters and beautification. No makeup or concealer, as in makeup in the clinical photo. For tone variation, see different skin tone between photos.
Documenting after treatment: what to watch for?
When following up a high-care area, follow-up photos help record swelling, ecchymosis and the bluish look that can appear under thin skin, the Tyndall effect. Photograph at the intervals defined by the professional, under the same light as the baseline, and note complaints such as pain, color change or asymmetry. If there are warning signs, the priority is care. The path for recording events is in complication photo: how to record safely.
And in Harmy?
Harmy has the Tear Trough point and generates an illustrative simulation from the frontal photo, preserving the original light, color and background. This means the shadow and color of the starting photo remain in the After, and the projection changes only the marked area. A photo with controlled light produces a more honest comparison in the slider.
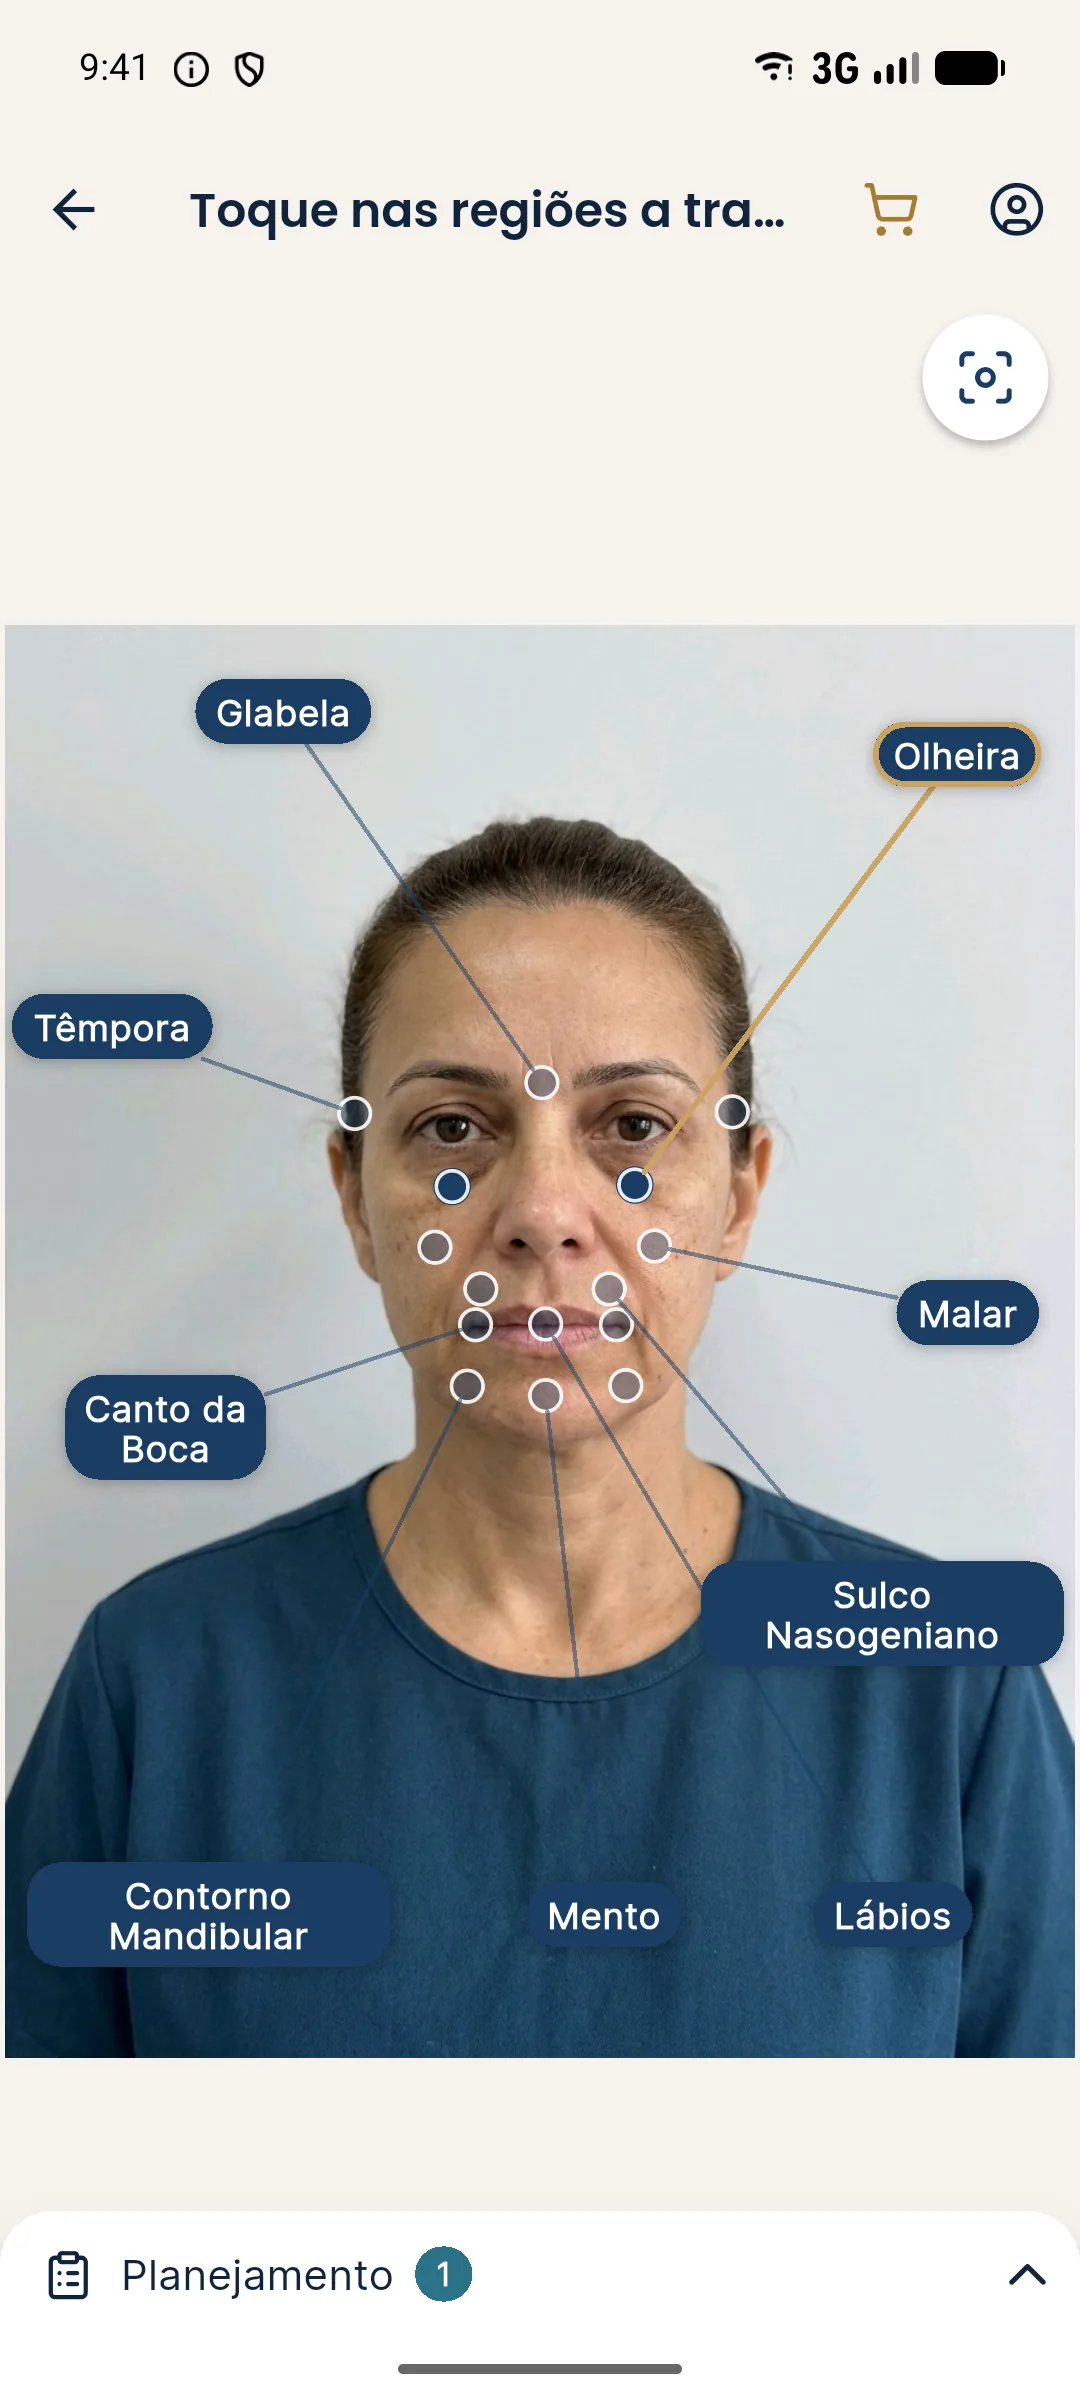
Documenting what the patient perceives
Patients usually point out the under-eye circle in the bathroom mirror, with light from above and the head tilted. Ask in which situation they notice it most and, if it makes sense, record a photo in that condition, labeled as overhead light. This brings the record closer to the real concern and helps align expectations: if the circle only shows under ceiling light, the conversation about what a treatment can or cannot change becomes more honest. The standardized record remains the basis of comparison.
Summary
Soft, slightly overhead light, lens at eye level, chin slightly raised and white balance locked. Without that control, the under-eye circle in the photo belongs more to the light than to the patient.
Frequently asked questions
How do you photograph under-eye circles for documentation?
With soft, slightly overhead light, the lens at eye level, the chin slightly raised and the gaze on the horizon. No flash, and the same light at every visit.
Why does light change the look of under-eye circles so much?
Because part of what you see is the shadow of the hollow, not color. Light from above deepens the shadow, and strong frontal light hides it. Without control, the before and after cannot be compared.
What is the difference between a color-based and a volume-based dark circle in the photo?
A pigmented dark circle depends on color and is affected by white balance. A volume or shadow circle depends on relief and light direction. Documenting both helps the professional tell them apart.
Does Harmy simulate under-eye circles?
Yes, the app has the Tear Trough point and generates an illustrative simulation from the frontal photo, keeping the original light and color. It does not replace the clinical assessment of the area.
Harmy images are illustrative simulations generated by AI from the patient's photo to support the conversation between practitioner and patient. They are not a promise of results. Indication, technique, product and volume are solely the decision of the licensed practitioner. This content is for information only and does not replace a clinical assessment.