
How to mark the nasolabial fold in Harmy
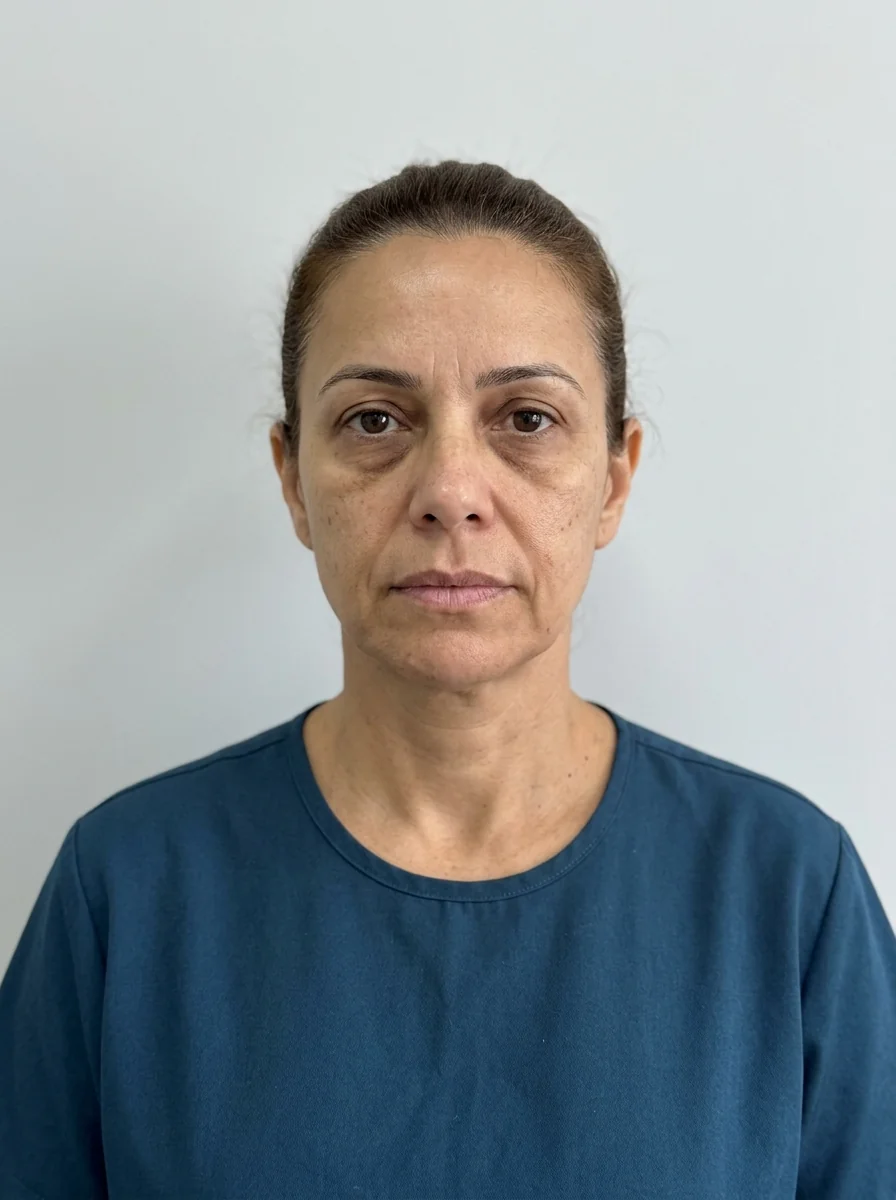
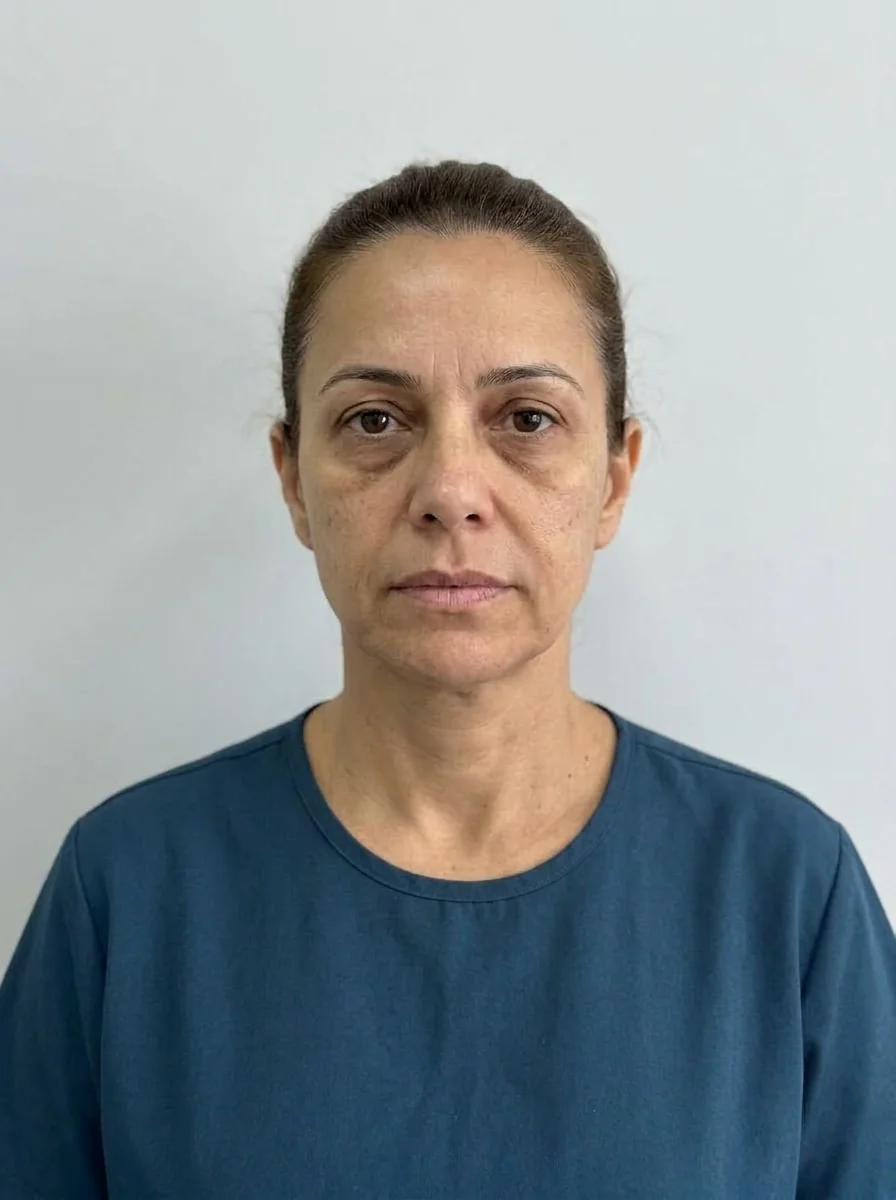 BeforeSimulation
- Artery
Quick facts
- Point in the app
- Nasolabial Fold
- Sample simulation volume
- 2 ml
- Shortcuts that use the Fold
- Maintenance (1 ml Subtle) and Full harmonization (1 ml Moderate)
- Risk of the area
- High vascular risk
The nasolabial fold (popularly, smile lines) is one of the most common concerns in the consultation and one of the areas where the projection helps most to align expectations. It is also an area that calls for care: its vascular anatomy demands extra attention, and the app's image should never be read as a technique recommendation.
How do I mark the Nasolabial fold in Harmy?
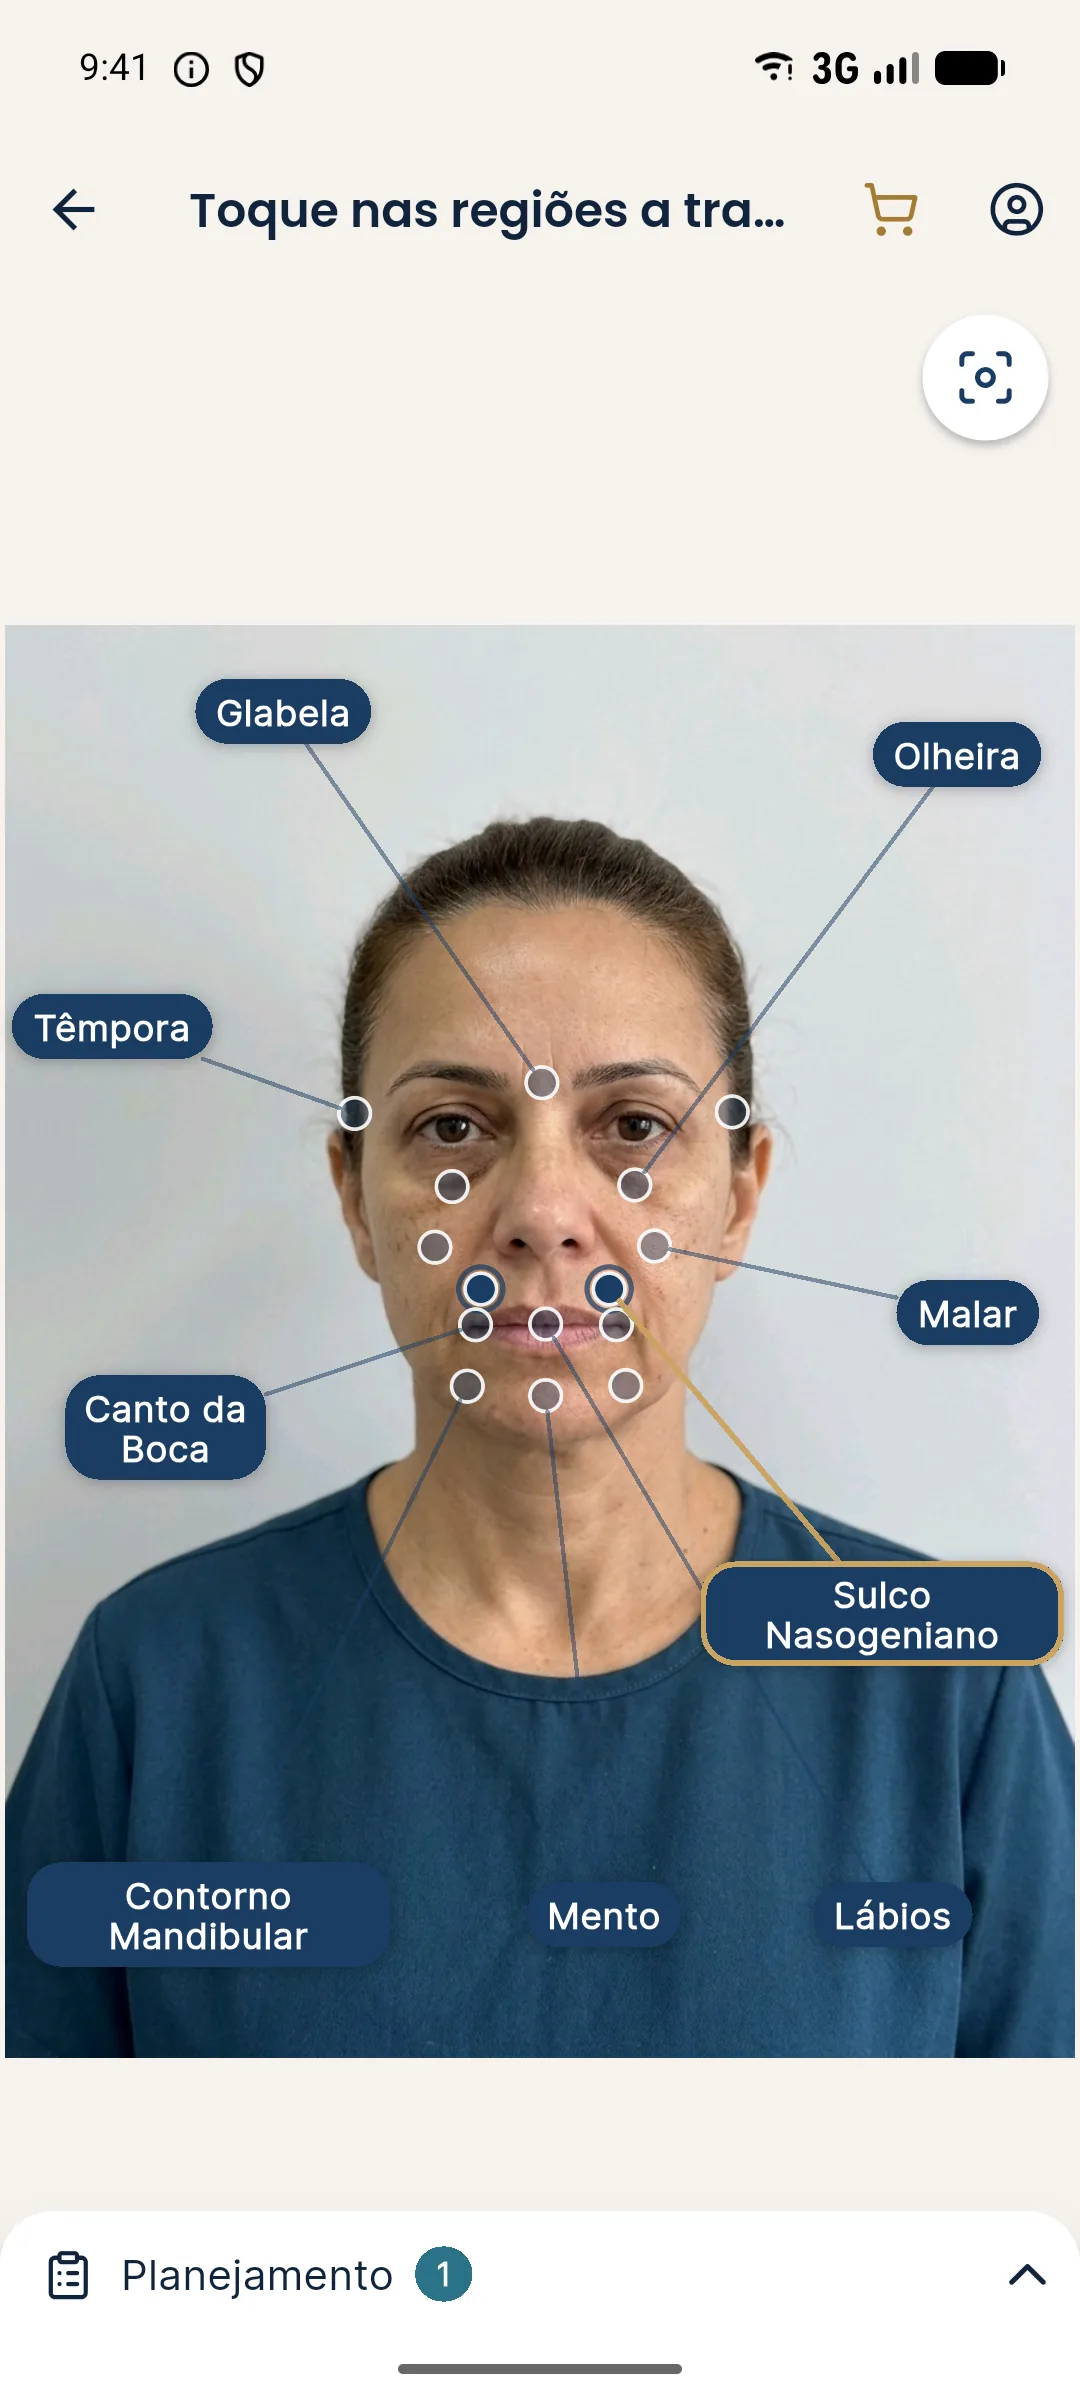
- With the front-facing photo approved, go to the marking.
- Tap the Nasolabial Fold point, in the crease between the side of the nose and the corner of the mouth.
- In the Plan, adjust the ml and intensity.
- Tap Create projection and compare on the slider.
How many ml and which intensity?
The sample simulation uses 2 ml. The marking shortcuts use 1 ml: Subtle in Maintenance and Moderate in Full harmonization. The step is 0.5 ml, from 0.5 to 5 ml, and the value is the total for both sides.
| Conversation | Starting point | Expected reading |
|---|---|---|
| Soften without changing the expression | 0.5 to 1 ml, Subtle | Less marked crease, expression preserved |
| Show a clear difference | 1 to 2 ml, Moderate | Softer fold, natural transition |
| Request to erase the fold | avoid the expectation | Explain that the goal is to soften, not eliminate |
Remember that filling the fold on its own does not always address the cause, which may be a loss of support in the midface. That is why it pays to compare with a projection that includes the Cheekbone.
What to expect from the image
The AI reduces the depth of the fold, keeping skin, texture and expression. On some faces, the fold does not disappear entirely, and that is consistent. If the image looks artificial, reduce the ml before changing the intensity. For using the slider, see Before and After.
Good practices
Don't use the image to sell a larger volume. If the patient asks for more, show another projection and talk about what changed. For the proposal side, see nasolabial fold filler and good marking practices.
Common errors when marking the Fold
The most common error is photographing the patient smiling, even slightly. A smile deepens the fold and shifts the position of the cheekbone, and the comparison loses meaning: the Before looks worse and the After looks like a huge difference. Ask for a neutral expression and a relaxed mouth.
The second error is promising that the fold "will disappear". The nasolabial fold is an anatomical crease, and the realistic goal of treatment is to soften it. When you align this beforehand, the subtle image is read as good news, not as an app failure.
The third error is ignoring the cause. On many faces, the fold becomes more evident because the midface has lost support, and looking only at the crease leaves the conversation incomplete. That is why it pays to show two projections: one with the Fold only and another with the Cheekbone, and let the patient compare. See explaining the nasolabial fold to the patient for the language to use in the consultation.
Frequently asked questions
What does Harmy project on the nasolabial fold?
The AI softens the depth of the fold in the image according to the ml and intensity chosen, without altering the rest of the face.
Which ml should I use on the Nasolabial Fold?
The sample simulation uses 2 ml; the shortcuts use 1 ml. These are starting points, and the real volume is the qualified professional's decision after assessment.
Why is the nasolabial fold considered a risk area?
Because it is highly vascularized, with the facial and angular arteries nearby. Vascular complications are rare, but they are part of the consent and require hyaluronidase on hand.
Can I project the fold without the Cheekbone?
Yes. Marking only the Fold shows the isolated effect, and you can then compare it with a projection that includes the Cheekbone.