
Smile photo in the facial assessment: what to record

Quick facts
- Record
- Rest and spontaneous smile and, if indicated, maximum smile, under the same conditions.
- Look at
- Tooth and gum display, smile arc, symmetry, and folds.
- Caution
- A forced smile misleads; label the smile type on each photo.
- Frontal and oblique
- The frontal shows symmetry; the oblique shows the smile curve and the cheeks.
The smile is one of the last things patients notice about themselves and one of the first things others notice about them. In the facial assessment, it shows something rest hides: how the upper lip rises, how much tooth and gum shows, whether the mouth corners move symmetrically, and how much the folds deepen. Photographing the smile is therefore part of the exam, and it needs a method like any other pose.
This page covers what to record and how to standardize the smile photo. The assessment and the course of action are up to the qualified professional.
What does the smile photo show?
| Element | What is assessed |
|---|---|
| Upper lip | How far it rises and how it relates to the teeth |
| Teeth | Incisor display at rest and in the smile |
| Gums | Amount exposed in the smile, the topic of gummy smile photo |
| Smile arc | Curve of the upper teeth relative to the lower lip |
| Mouth corners | Position and symmetry; see mouth corners |
| Folds | Depth of the nasolabial folds in the smile |
| Eyes | Whether the smile involves the eyes, a sign of spontaneity |
This complements the assessment at rest. For the logic of rest and dynamics together, see face photo at rest and in motion.
Which smiles should I record?
- Rest, with the lips just touching, as the baseline.
- Spontaneous smile, the everyday one, obtained during conversation.
- Maximum smile, when indicated, to assess tooth and gum display, labeled as such.
The difference between the spontaneous and the posed smile can be large and is covered in a forced smile misleads the assessment. Always label the smile type on each photo, so you do not compare different categories.
How to position and light
The standard is that of the frontal photo: lens at eye level, Frankfort plane horizontal, gaze on the horizon, fixed distance, and soft light from the front and slightly above. Teeth are light and reflect light, so avoid excessive glare and flash. Keep the white balance locked so the tone of teeth and gums does not vary. See lighting for clinical facial photos and white balance in the clinical photo.
For details of the teeth and lips, a second, closer photo is worthwhile, using a crop rather than digital zoom. Cracked teeth change how the mouth reads: see cracked teeth in the lip photo.
Frontal or oblique?
Ideally both. The frontal shows symmetry, midline, and smile width; the oblique shows the smile curve and cheek volume. Oblique standardization is in 45-degree photo of the face. In both, keep the same angle and distance across visits.
How to talk with the patient
Many people are wary of smiling for the photo, out of embarrassment about their teeth, gums, or an asymmetry. Explain that the goal is to record the natural smile, without judgment, and that the photo stays in the medical record. Avoid comments about appearance during the photo. To point out asymmetries respectfully, see how to point out asymmetry without offending.
What to note
The smile type of each photo, the patient's concerns (for example, bother about the gums or a fold), observations about the teeth and lips, makeup use, date, light, and distance. For safe storage, see storing patient photos and image consent for clinical documentation.
And in Harmy?
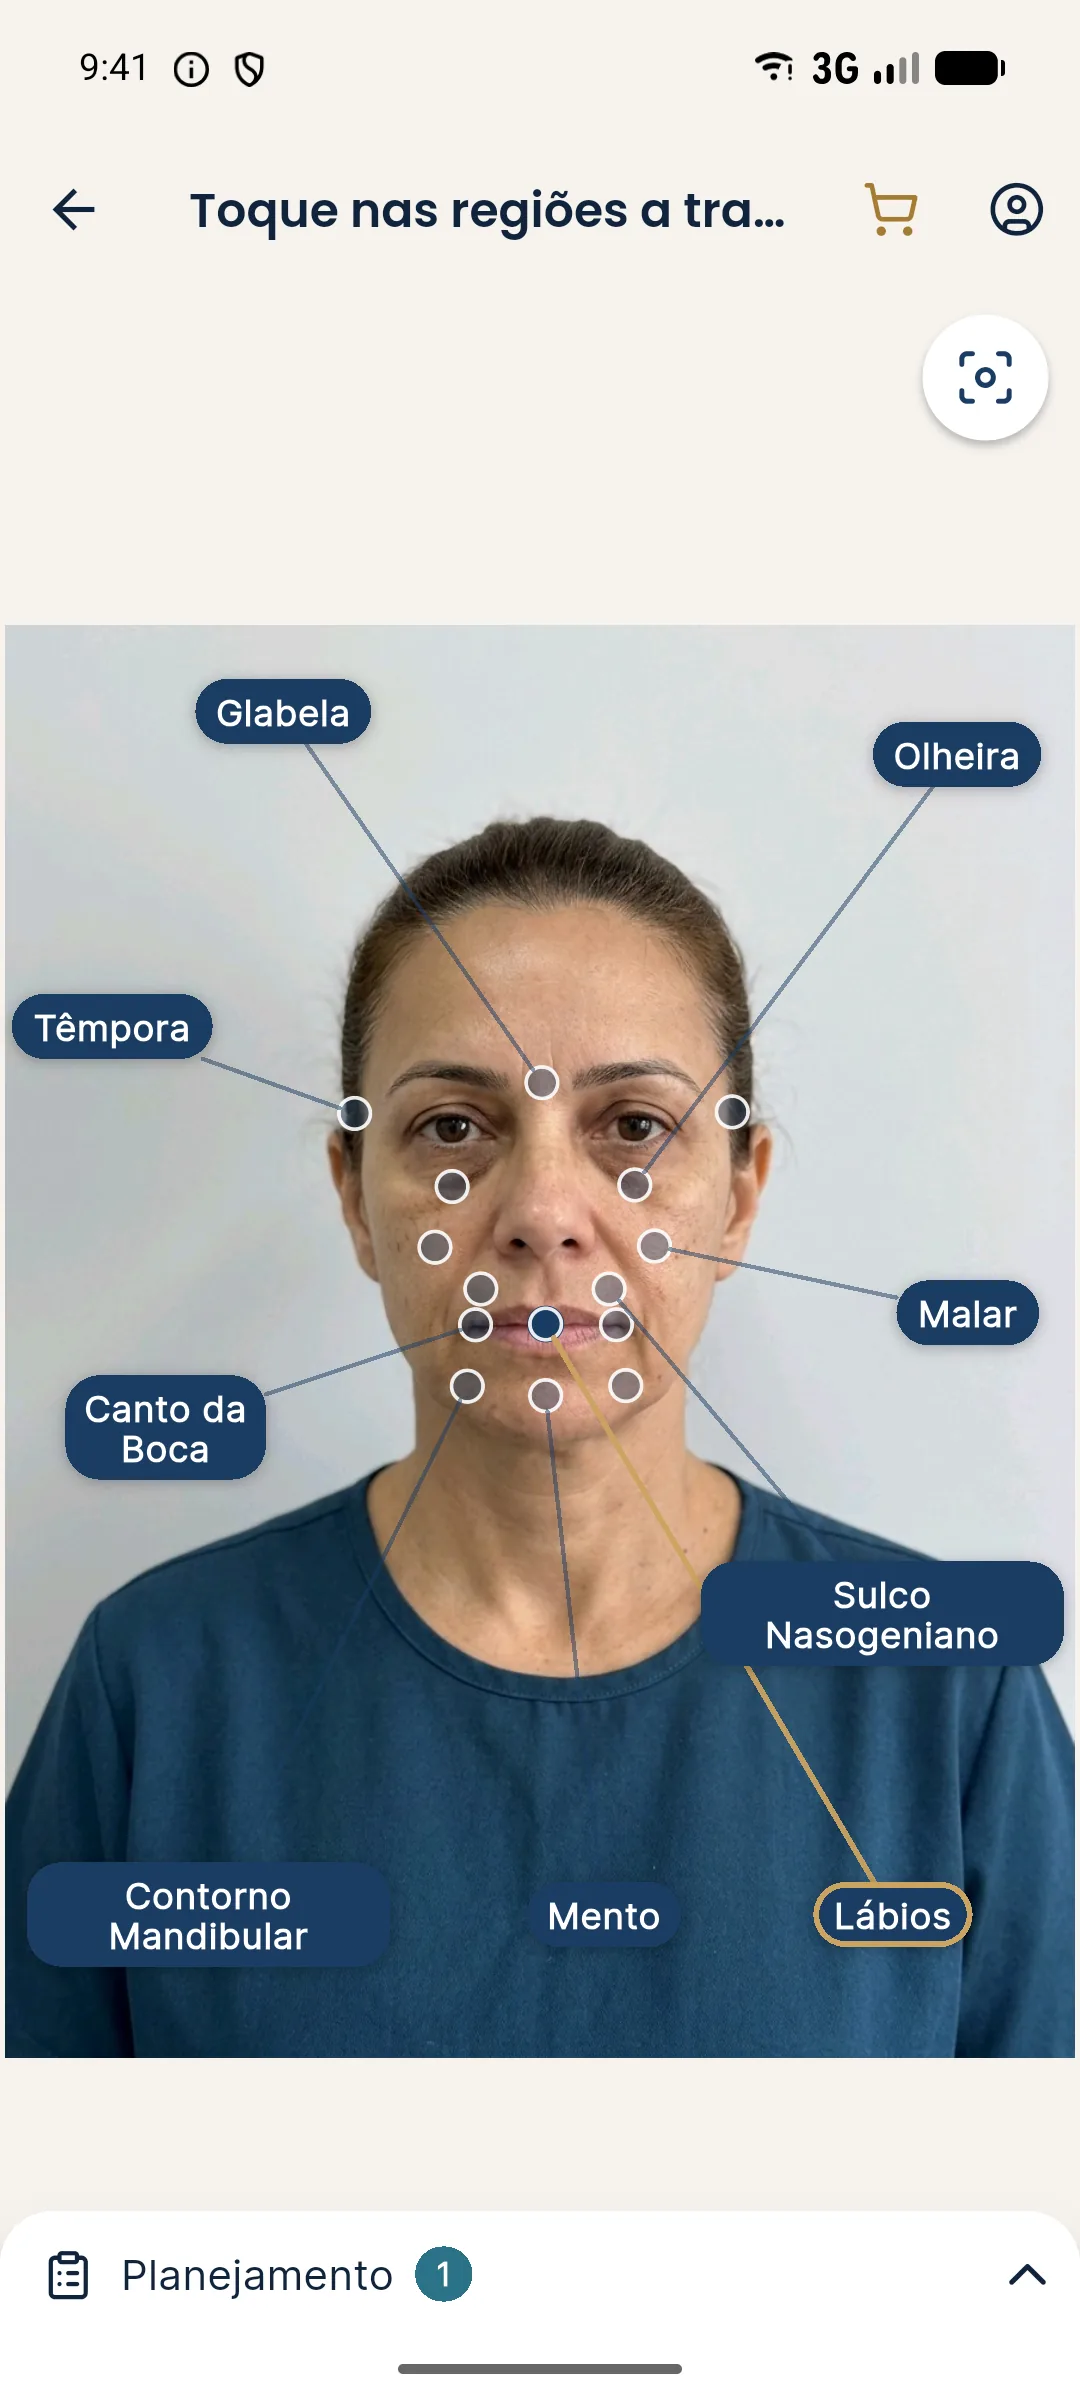
Harmy's projection preserves the expression of the original photo and is made from the frontal photo at rest, with the marked areas (such as Lips, Mouth Corner, and Nasolabial Fold). It does not simulate the smile. The smile photo is a documentation record for the clinic. A photo with a forced smile as the base would make the simulation inherit the contraction.
Smile and facial aging
Over time, the smile changes: the upper lip lengthens, tooth display decreases, and the folds deepen. Comparing the patient's smile across visits over months and years documents that change, but only if conditions are the same. Avoid attributing a difference in smile to a treatment without ruling out other factors, such as the pose, fatigue, or the state of the teeth. Serial records are a follow-up tool, not proof of effect.
Summary
Record rest and the spontaneous smile, label the type of each photo, standardize light, angle, and distance, and guide the patient with a light touch. A well-documented smile complements the assessment at rest and gives an honest basis for comparing later.
Frequently asked questions
Why photograph the smile in the facial assessment?
Because the smile shows the dynamics of the lips, mouth corners, and folds, which do not show at rest. It helps with planning, explaining to the patient, and comparing later.
Which types of smile should I record?
The spontaneous smile, the everyday one, and, when indicated, the maximum smile, to assess tooth and gum display. Label each one and also record the rest position.
What should I look at in the smile photo?
How much tooth and gum shows, the curvature of the smile, the symmetry of the mouth corners, the position of the upper lip, and the depth of the folds.
Does Harmy simulate the smile?
No. The projection preserves the expression of the original photo and is made from the frontal photo at rest. The smile photo is medical record documentation.
Harmy images are illustrative simulations generated by AI from the patient's photo to support the conversation between practitioner and patient. They are not a promise of results. Indication, technique, product and volume are solely the decision of the licensed practitioner. This content is for information only and does not replace a clinical assessment.