
Photo Alignment Errors in Before/After Comparisons
Quick facts
- Topic
- Aligning photos for comparison
- Common errors
- Distance, rotation, tilt, expression, light
- Tool
- Alignment by the eyes and guided capture
- Limit
- Alignment does not fix swelling or lighting
Comparing before and after photos is where a facial harmonization clinic most fools itself. Two seemingly identical images can carry differences in distance, angle or light that look like a change in the face. The patient sees one result, the practitioner sees another, and the conversation gets lost. Aligning with method is the cheapest way to avoid that noise.
What are the most frequent errors?
| Error | What seems to change | How to avoid it |
|---|---|---|
| Different distance | Nose and center of the face, face width | Mark the position of the device and the patient |
| Camera above or below the eyes | Forehead, chin and neck | Camera at eye level |
| Head rotation | Symmetry, midline, cheekbone | Head facing forward, gaze ahead |
| Lateral tilt | Height of the eyes and mouth corners | Pupil line horizontal |
| Different expression | Brow, folds, lips | Neutral expression, relaxed mouth |
| Different light and background | Shadow, apparent volume, color | Same light, same direction, same background |
| Swelling in the after photo | Apparent volume | Wait for it to resolve |
| Different device or lens | Perspective, color, sharpness | Standardize the device |
Each row has its own page: distance and lens in the assessment photo, neutral expression in the planning photo, photo lighting and swelling gets in the way of comparison.
What is the alignment step by step?
More detail on the standard in standardized clinical photography, aligning photos by the eyes to compare and reference lines on the frontal photo.
Why align by the eyes?
The eyes are a good reference point because they sit in a stable position and let you correct rotation, tilt and scale. By aligning two photos on the pupil line and the distance between the pupils, the comparison of contour and volume becomes fairer. The technique does not fix lighting, expression, swelling or lens differences: it reduces one kind of error, not all of them.
How does Harmy help?
In Harmy, the "Add actual result" feature uses guided capture: the app shows the before photo as a transparent overlay on the camera, so you can reproduce the pose, distance and tilt. The saved photo is aligned by the eyes, and the comparison offers Projection, Actual result and Projection vs Actual. Remember the projection is an illustrative simulation, not a promise of results.
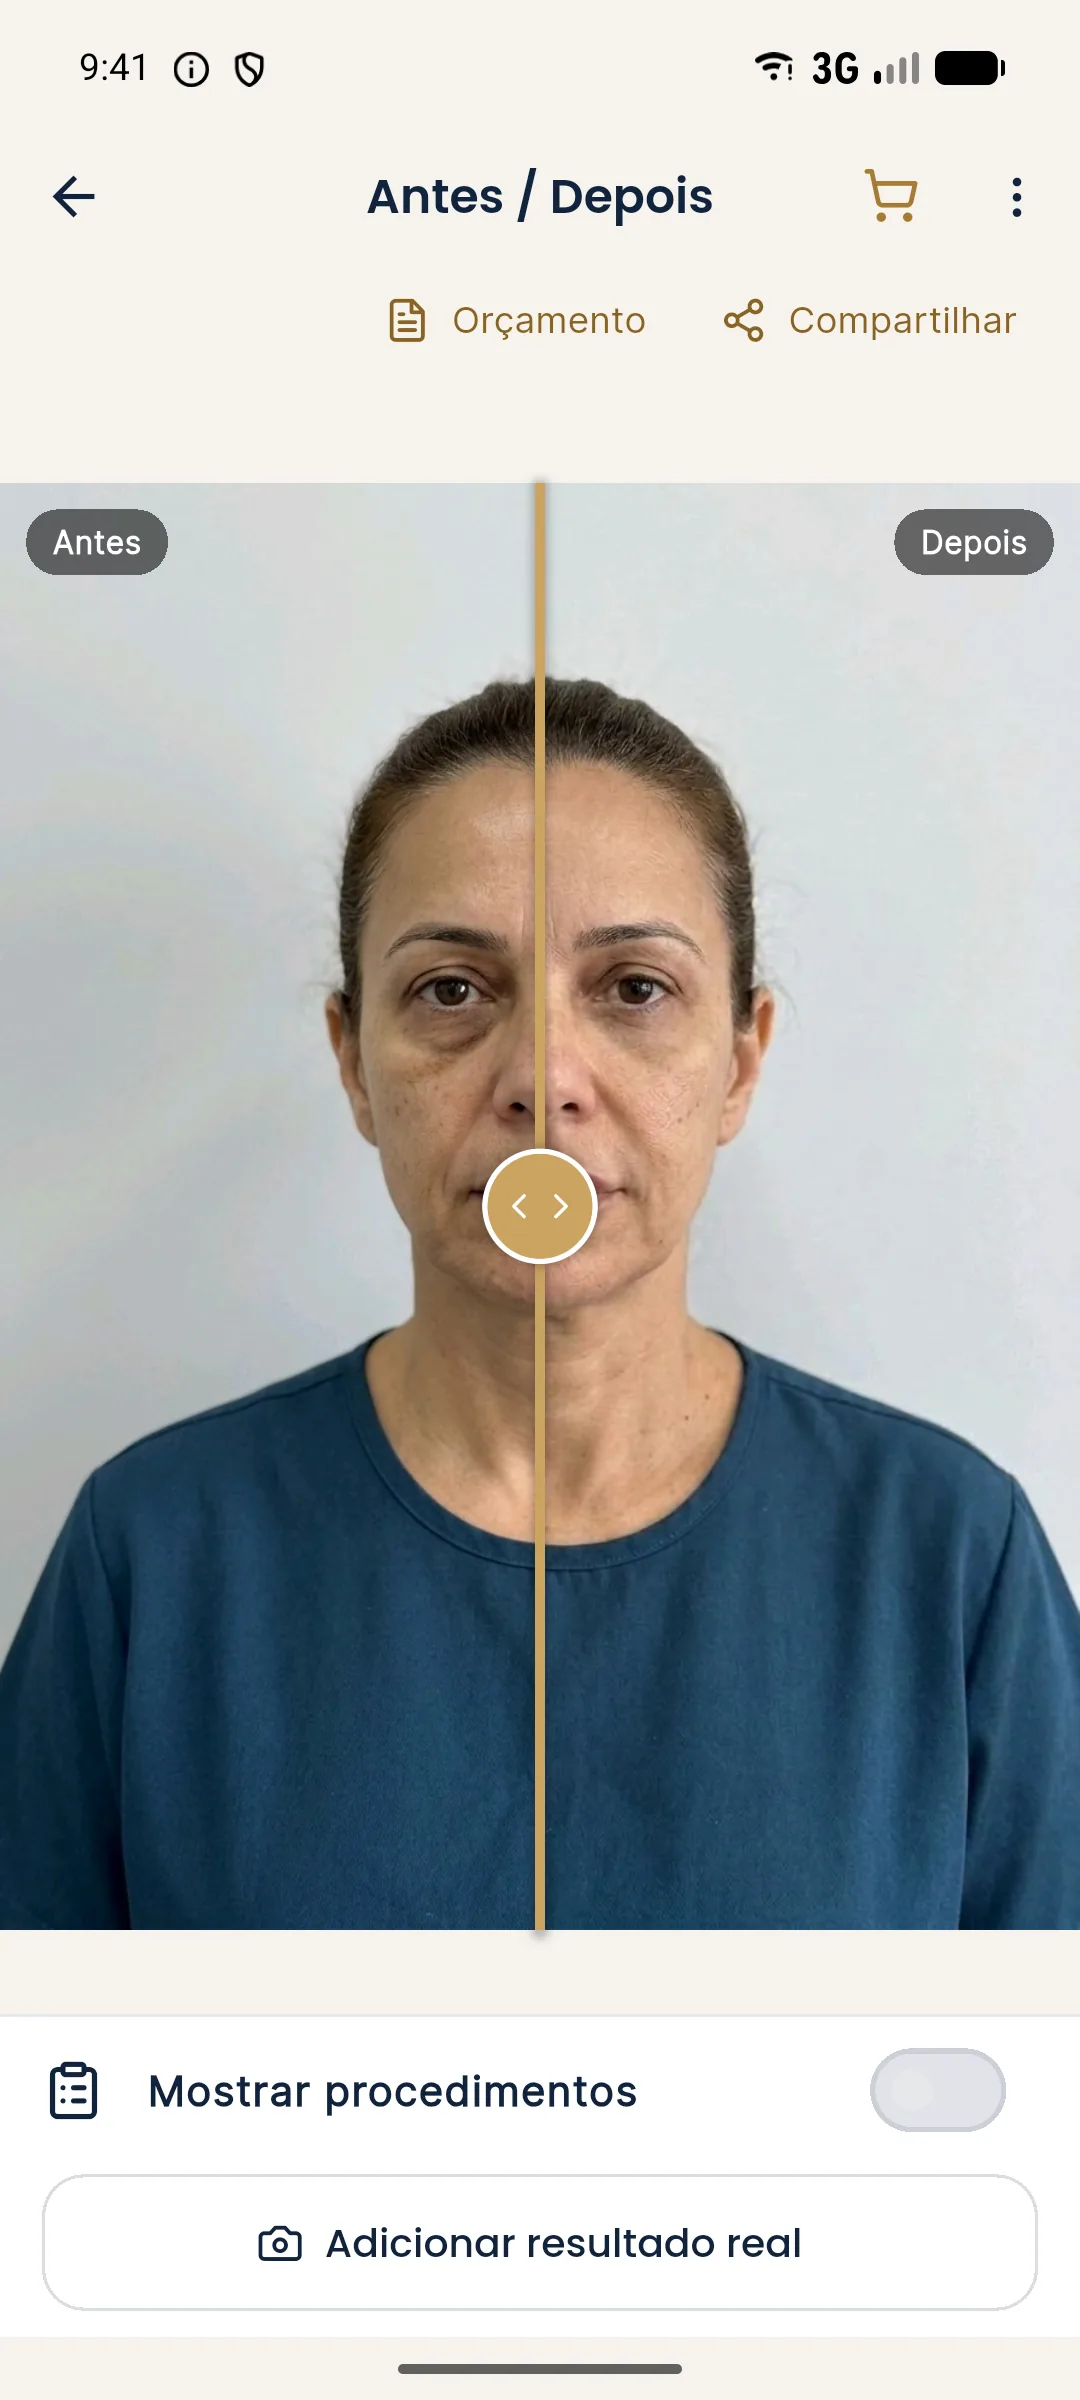
See the flow in aligned post-procedure photo in Harmy and comparing projection and actual result in Harmy.
What to do when the photos do not match?
- Check what changed besides the face. Light, background, device, distance.
- Retake the follow-up photo, if possible, to the same standard.
- Avoid concluding from a single photo. Two photos on the same day reduce the risk of artifacts.
- Explain to the patient. Show that the difference may come from the capture, not the face.
- Record the limitation in the patient record.
How do you talk to the patient?
Patients usually compare in the mirror or with a selfie, which carries its own distortion. Showing a standardized comparison helps recalibrate. If the patient insists on using their own photo, explain that perspective changes what is seen. See mirror, selfie and photo and side-by-side or slider comparison.
How do you train the eye and the team?
The skill of spotting alignment errors improves with practice. A simple exercise: overlay two photos of the same patient taken on the same day in two slightly different poses, and observe what changes even though the face has not. The result is almost always surprising: a bigger nose, a wider jaw, asymmetry that appears and disappears. Showing this exercise to the team builds a culture of standardization.
A few practices that cement the method:
- A written photo protocol, with distance, height, light, background and expression.
- A trained photographer, preferably always the same person.
- A monthly review of a sample of photos, to catch deviations from the standard.
- Discarding off-standard photos for comparison use, with the reason recorded.
- A check before comparing: whoever will analyze verifies distance, angle and light before drawing conclusions.
Even with all this, some photos cannot be compared. Admitting that is part of rigor. Instead of forcing a conclusion, record that the comparison was limited and agree on a new capture. Patients understand "I need to retake the photo" better than a doubtful conclusion. See also face without expression: how to avoid it and hair, earrings and glasses in the assessment photo.
And what about old photos with no standard?
The patient's old photos, taken by themselves, rarely follow a standard. Use them with caution, as a qualitative reference (for example, to see what the face looked like before), not as a basis for measurement. Explain to the patient that comparison with those photos is approximate and that the standardized series, from now on, will be the reliable reference.
Record in the patient record the origin of each photo and the level of confidence. That protects you from hasty conclusions and gives the patient a clear explanation when comparison is not possible.
Summary
Alignment is method: same distance, height, light, expression and device, swelling timeframe respected and alignment by the eyes. Record limitations and do not decide from a single photo. The clinical decision belongs to the qualified professional, in line with the rules of their professional board in Brazil.
Frequently asked questions
What are the most common errors when comparing before and after photos?
A different camera distance, head rotation or tilt, a different expression, different light and background, and an after photo taken during swelling. Any one of them alone already skews the comparison.
Does aligning photos by the eyes solve it?
It reduces position and scale errors, but does not fix lighting, expression, swelling or lens differences. Care at capture is still needed.
How does Harmy help with alignment?
Guided capture of the actual result shows the before photo as a transparent overlay on the camera, and the saved photo is aligned by the eyes for comparison.
Can I compare photos taken on different devices?
You can, but with caution. Lenses and processing differ, and the comparison loses precision. Ideally, use the same device, the same distance and the same light.
Harmy images are illustrative simulations generated by AI from the patient's photo to support the conversation between practitioner and patient. They are not a promise of results. Indication, technique, product and volume are solely the decision of the licensed practitioner. This content is for information only and does not replace a clinical assessment.