
Facial light points: where other people's eyes land
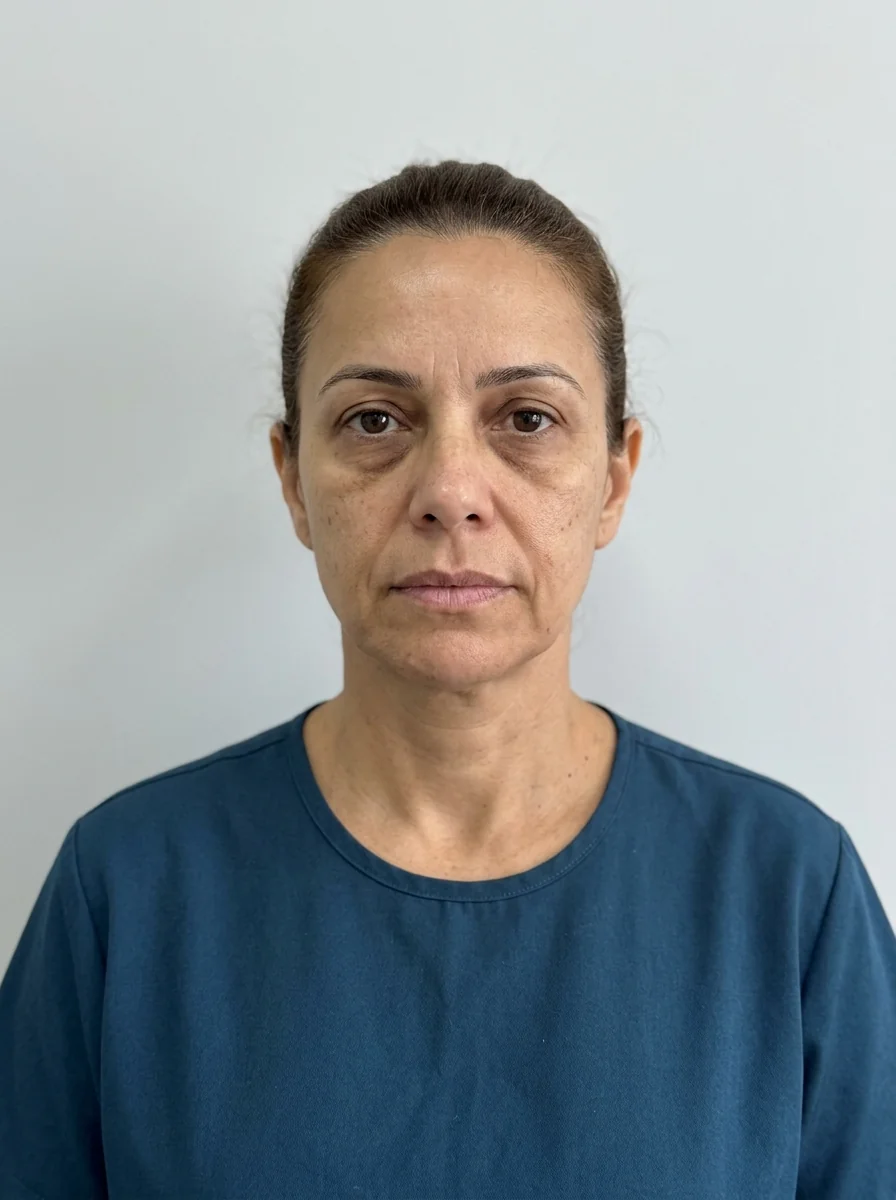
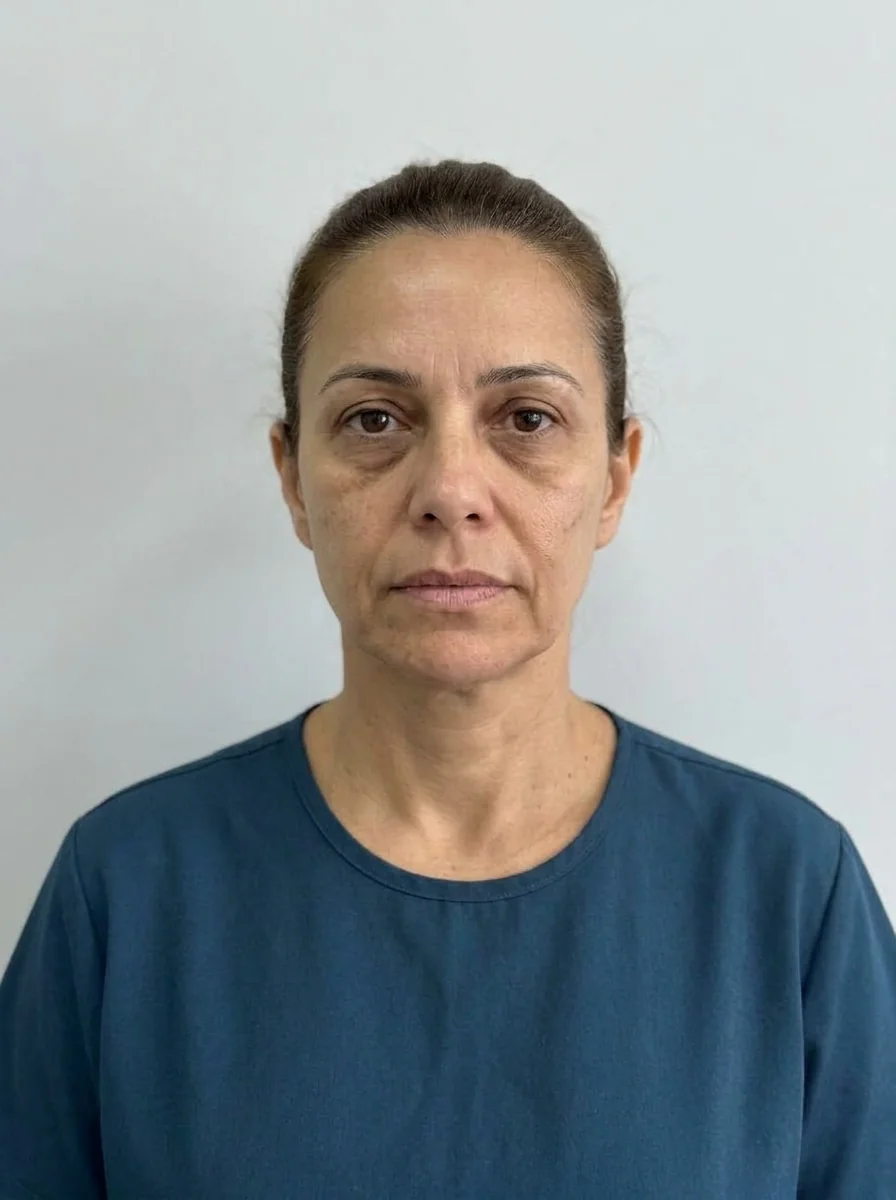 BeforeSimulation
Quick facts
- Concept
- Convex areas of the face reflect light and draw the eye, such as the cheekbone, forehead, nasal dorsum and chin
- How it is used
- Assess where light falls and whether its distribution is balanced across areas
- Effect of age
- Light rises and concentrates less on the cheekbone, and starts to land in folds and shadows
- Pitfall
- Creating too many light points and producing a shiny, artificial face
A face is not seen as a set of measurements, it is seen as a distribution of light and shadow. Convex areas, which are more exposed, reflect light and draw the eye. Concave areas stay darker. What a person perceives as a "rested face", "tired face", "full face" or "gaunt face" is, to a large extent, how light is distributed over these contours.
The "light point" is the informal name for this logic: where light lands and, therefore, where the other person's gaze lands. This page shows how to think this way in planning, without turning the face into a shop window. It connects with frontal facial analysis: checklist, lighting for the planning photo and light for clinical facial photos.
Where does light land on a face?
On a young face with preserved volume, light points tend to sit on a few convex areas: the forehead, the projection of the cheekbone, the nasal dorsum, the philtrum and the vermilion of the lips, and the chin. The transition between them is smooth, and the contours form a continuous curve, which some authors call the ogee curve, seen at three-quarter view.
With aging, this distribution changes. The midface loses volume, light stops concentrating on the cheek and starts to spread unevenly, highlighting folds and shadows. The "triangle of youth", with its base at the cheekbone and apex at the chin, inverts, and the visual weight moves down. See triangle of youth, midface aging and tired face.
- Forehead: reflects light when smooth and well projected. Depressions and lines break up the reading.
- Cheekbone: the main light point of the midface. Its projection and position define the "light" of the face.
- Nasal dorsum: central line of light. Deviations and a hump alter the reflection.
- Lips: shine of the vermilion, especially of the lower lip.
- Chin: the lower light point, which closes the face.
Why does this matter in planning?
Thinking in light and shadow changes the question of the plan. Instead of "which wrinkle to treat", you ask "where did the light lose its place". This can lead to a more economical and more natural plan. If the cheekbone reflects light again, the under-eye hollow and the nasolabial fold soften, without needing to treat them directly.
Some examples of the reasoning:
| Observation | Reading through light | General direction |
|---|---|---|
| Shadow under the eye and a marked fold | Cheekbone with no light reflection | Assess midface support before treating the shadow |
| "Flat" face in a front photo | Little relief, light too diffuse | Assess cheekbone and chin projection |
| Shiny forehead and dull cheekbone | Light concentrated high up | Rebalance toward the midface |
| Chin with no light | Under-projected chin | Assess chin projection |
| Excessive shine on the cheekbone | Too much volume or high position | Avoid more volume; review the proportion |
The same reasoning explains why some results look "artificial": they create a light point that is too strong, which does not talk to the rest of the face. A very projected cheekbone, a very shiny lip or a very prominent chin draw attention in a way that gives the procedure away. See artificial-looking face, face overdone with fillers and natural-effect plan.
The cheekbone as the protagonist
The cheekbone is, on most faces, the main light point of the midface, and so it holds a central place in planning. Supporting the cheekbone tends to change how light reflects on the area and to soften neighboring folds and shadows, in a logic of balance. See cheekbone filler, ideal cheekbone projection and cheekbone and tear trough: combining in the plan.
Position matters as much as volume. A projected cheekbone placed too high or too low shifts the light point and gives the face an odd look. Assessing at three-quarter view and in profile, with side light, is the best way to see this. See midface with no projection in profile and flat cheekbone.
Be careful with photography
The light the professional uses to assess changes what they see. Light from above erases the contours of the midface and hides folds. Very strong side light exaggerates them. Diffuse front light flattens them. To compare before and after, the light has to be the same, and the patient in the same position.
This also applies to the photo that feeds the simulation. The light in the photo interferes with how the area reads and with the projection, and a poorly lit photo can mislead. Standardize, and retake the photo if needed. See office light and skin tone, window as a light source in clinical photos and lighting for the planning photo.
Talking with the patient
The notion of a light point is intuitive for the patient, and it helps explain a plan. Instead of talking about ml, talk about "giving the cheek its support back so light falls there again". This connects the procedure to an effect they can picture, without promising a result. It also helps justify why you start at a point that seems far from the concern.
What Harmy shows
The Harmy simulation can show the effect of restoring volume in the cheekbone on the whole face, and the patient usually notices the difference in light on the cheek. Because the app works with the photo that was sent, the lighting of the photo affects the result, and the projection does not change the lighting of the scene.
In short
Thinking of the face in light and shadow helps prioritize: restoring where light lands tends to be more effective and more natural than treating each sign. The caution is not to create too many light points and to standardize lighting when assessing and comparing. Results vary from person to person and depend on individual factors. The choice belongs to the licensed professional, according to the rules of their professional board in Brazil.
Frequently asked questions
What is a facial light point?
It is the convex area of the face that reflects more light and draws the eye, such as the apple of the cheek, the forehead, the nasal dorsum and the chin. The distribution of these points influences the perception of youth and harmony.
Do light points change with age?
They usually do. With volume loss in the midface, light stops concentrating on the cheek and starts to reveal folds and shadows, which contributes to a tired look.
Does cheekbone filler create a light point?
It can change how light reflects on the cheek by adding support and projection. The effect should be subtle, and the indication belongs to the professional after assessing the whole face.
Is there an ideal light point?
There is no single ideal. The distribution varies with sex, age, ancestry and individual features. The goal is harmony and naturalness, not reproducing a standard.
Harmy images are illustrative simulations generated by AI from the patient's photo to support the conversation between practitioner and patient. They are not a promise of results. Indication, technique, product and volume are solely the decision of the licensed practitioner. This content is for information only and does not replace a clinical assessment.